




How to get Armor in Wardogs
How to Get Armor in Wardogs
Armor is essential for survival in Wardogs, protecting you from enemy fire and damage during combat. This guide walks you through the simple process of purchasing and equipping armor at the game’s vendor, so you can start your missions with proper protection.
Locating the Gun Vendor
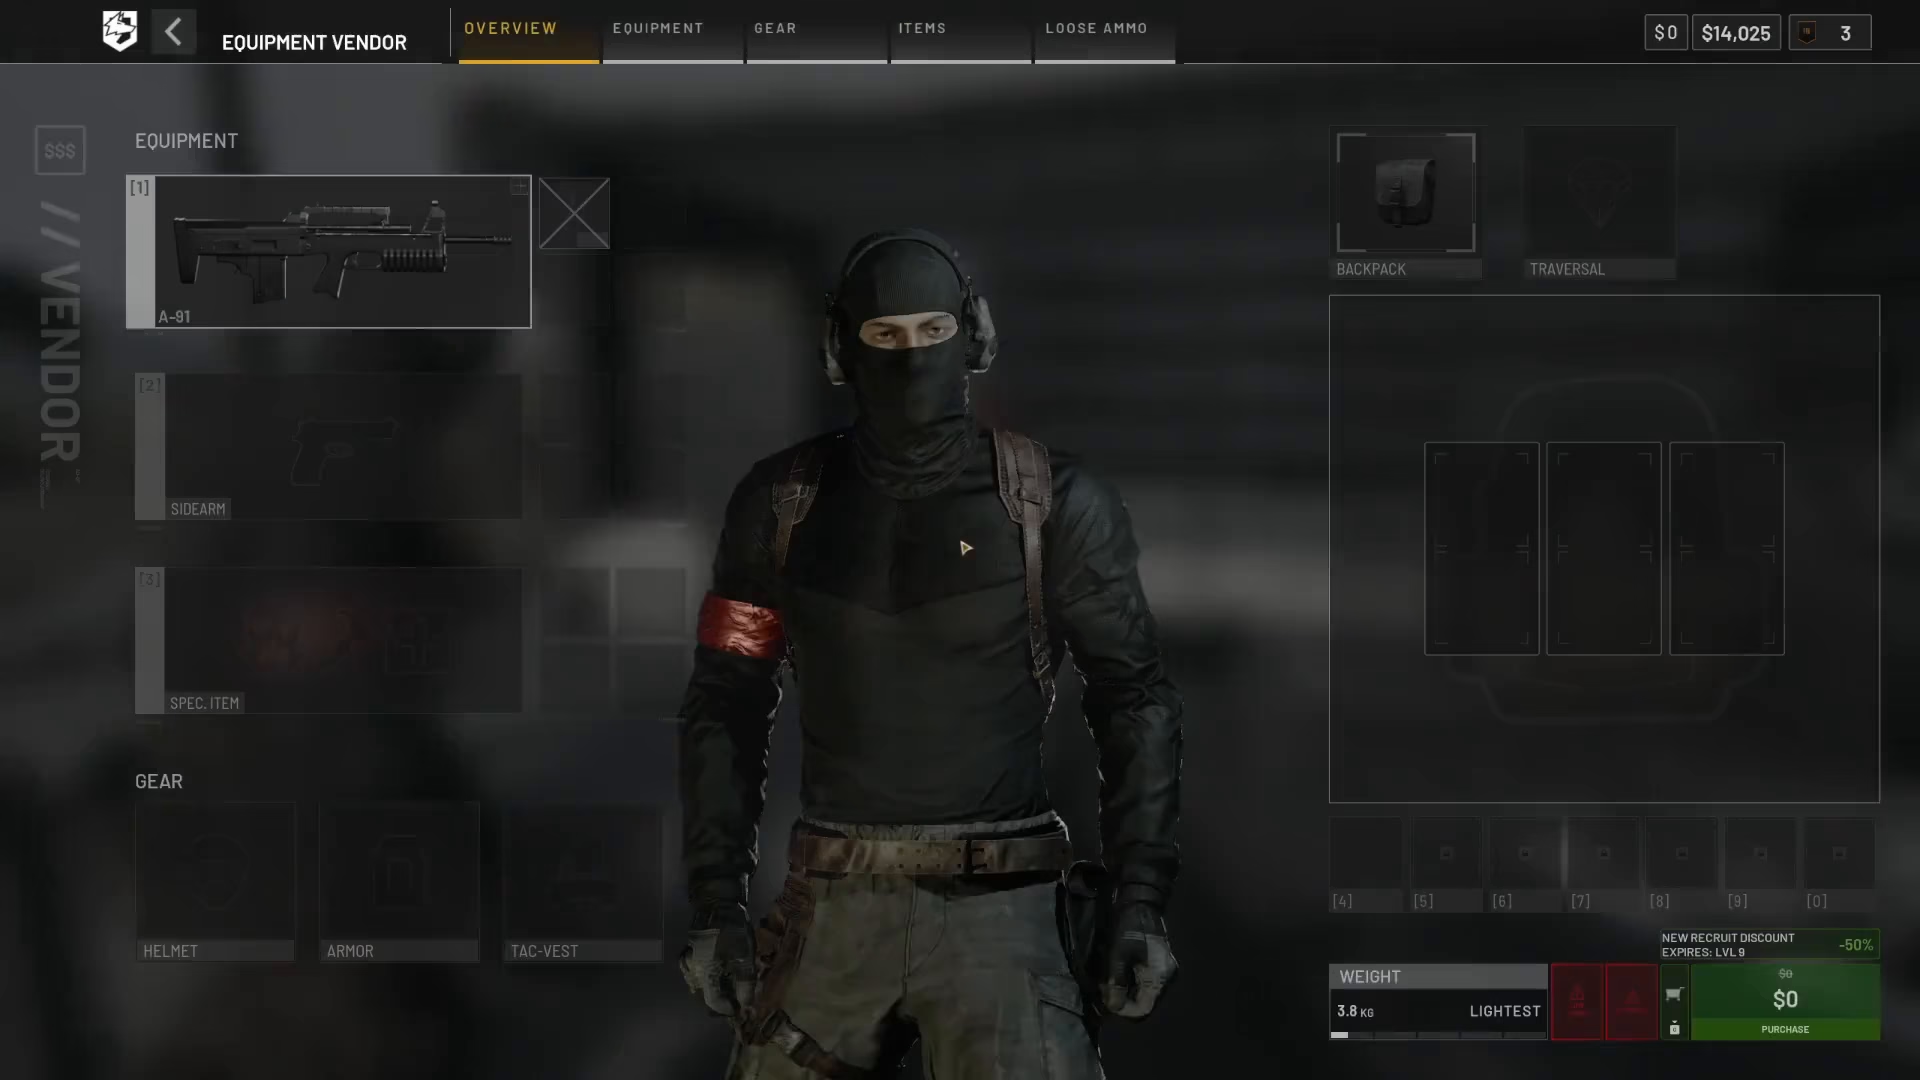
To begin acquiring armor, you’ll need to find the gun vendor. The vendor is conveniently located at your spawn point when you start the game. Simply navigate to this location when you first load in.
Accessing the Gear Menu
Once you’ve reached the gun vendor, interact with them to open the shop interface. Look for the “Gear” option located at the very top of the menu. This section contains all armor and protective equipment available for purchase.
Understanding Your Armor Options
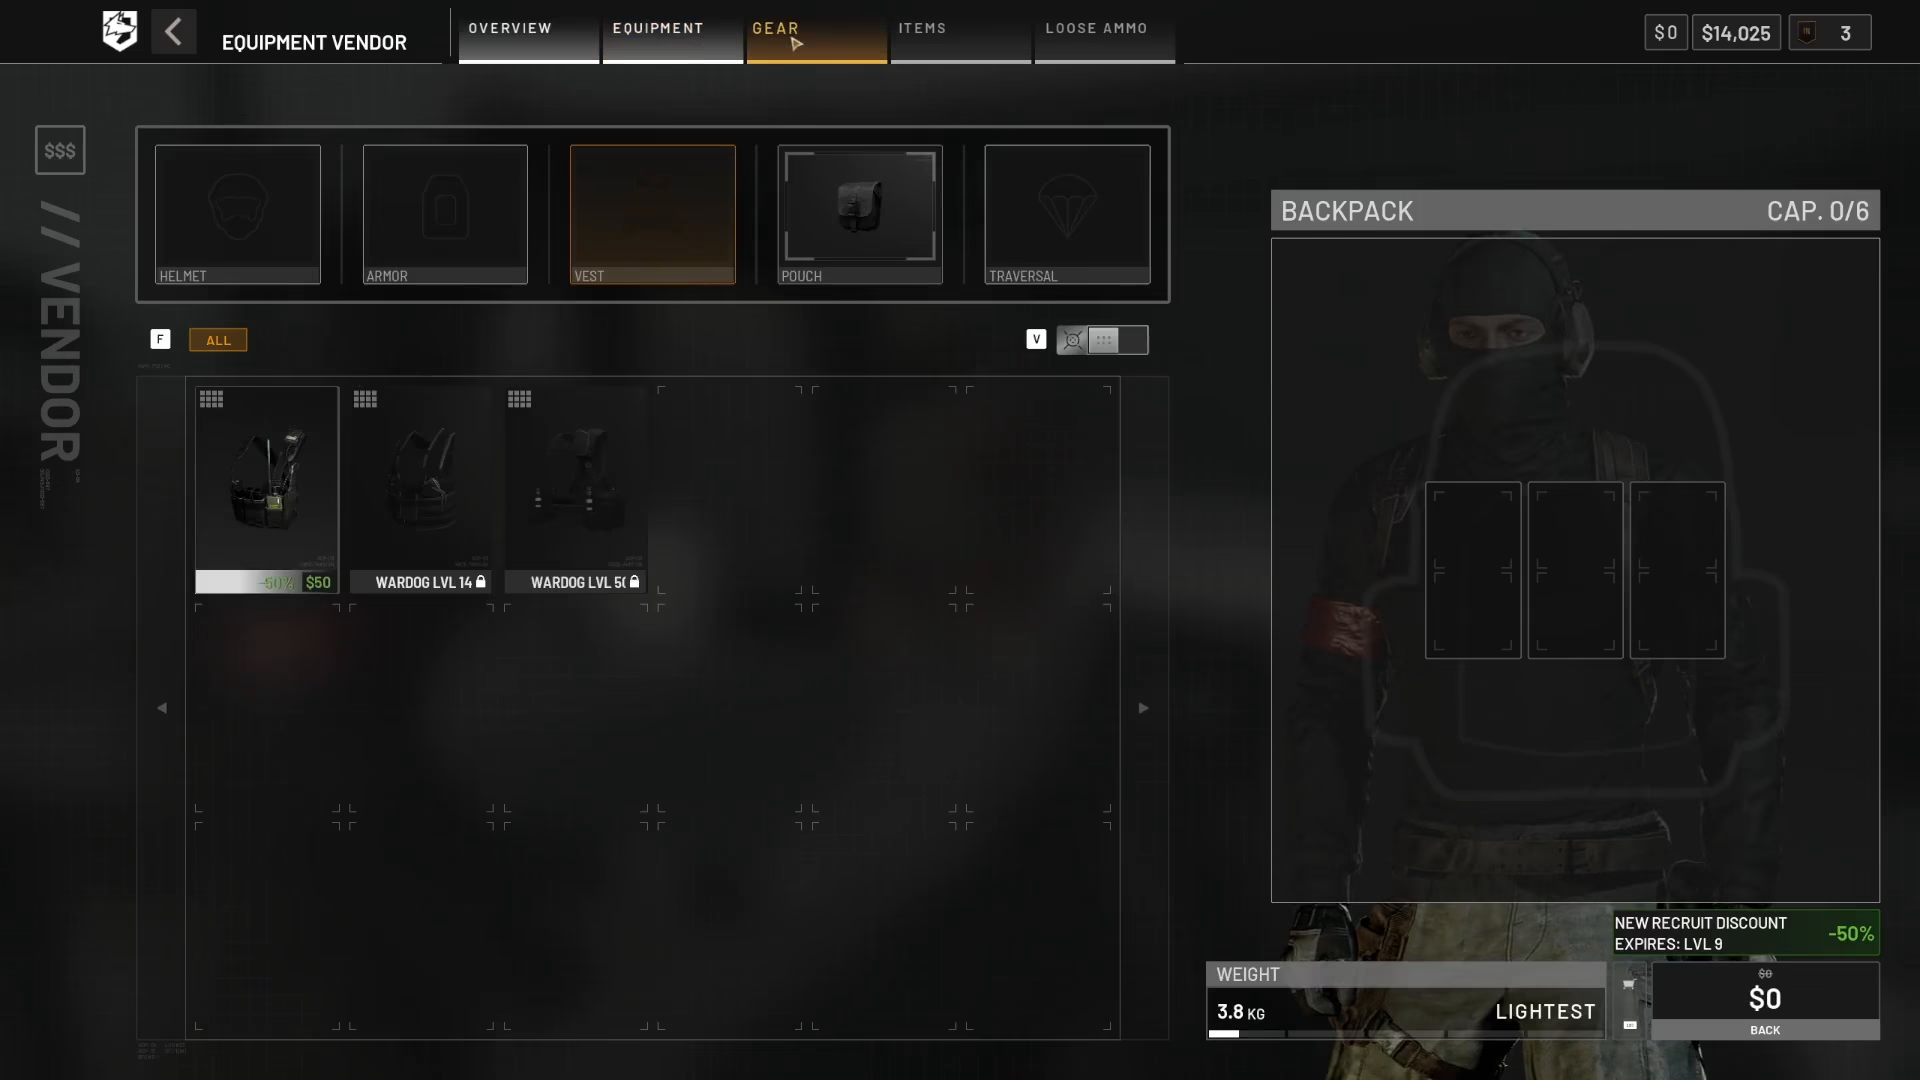
Within the Gear menu, you’ll see several armor categories listed on the left-hand side:
Helmet
Armour
Vest
Pouch
Purchasing a Helmet
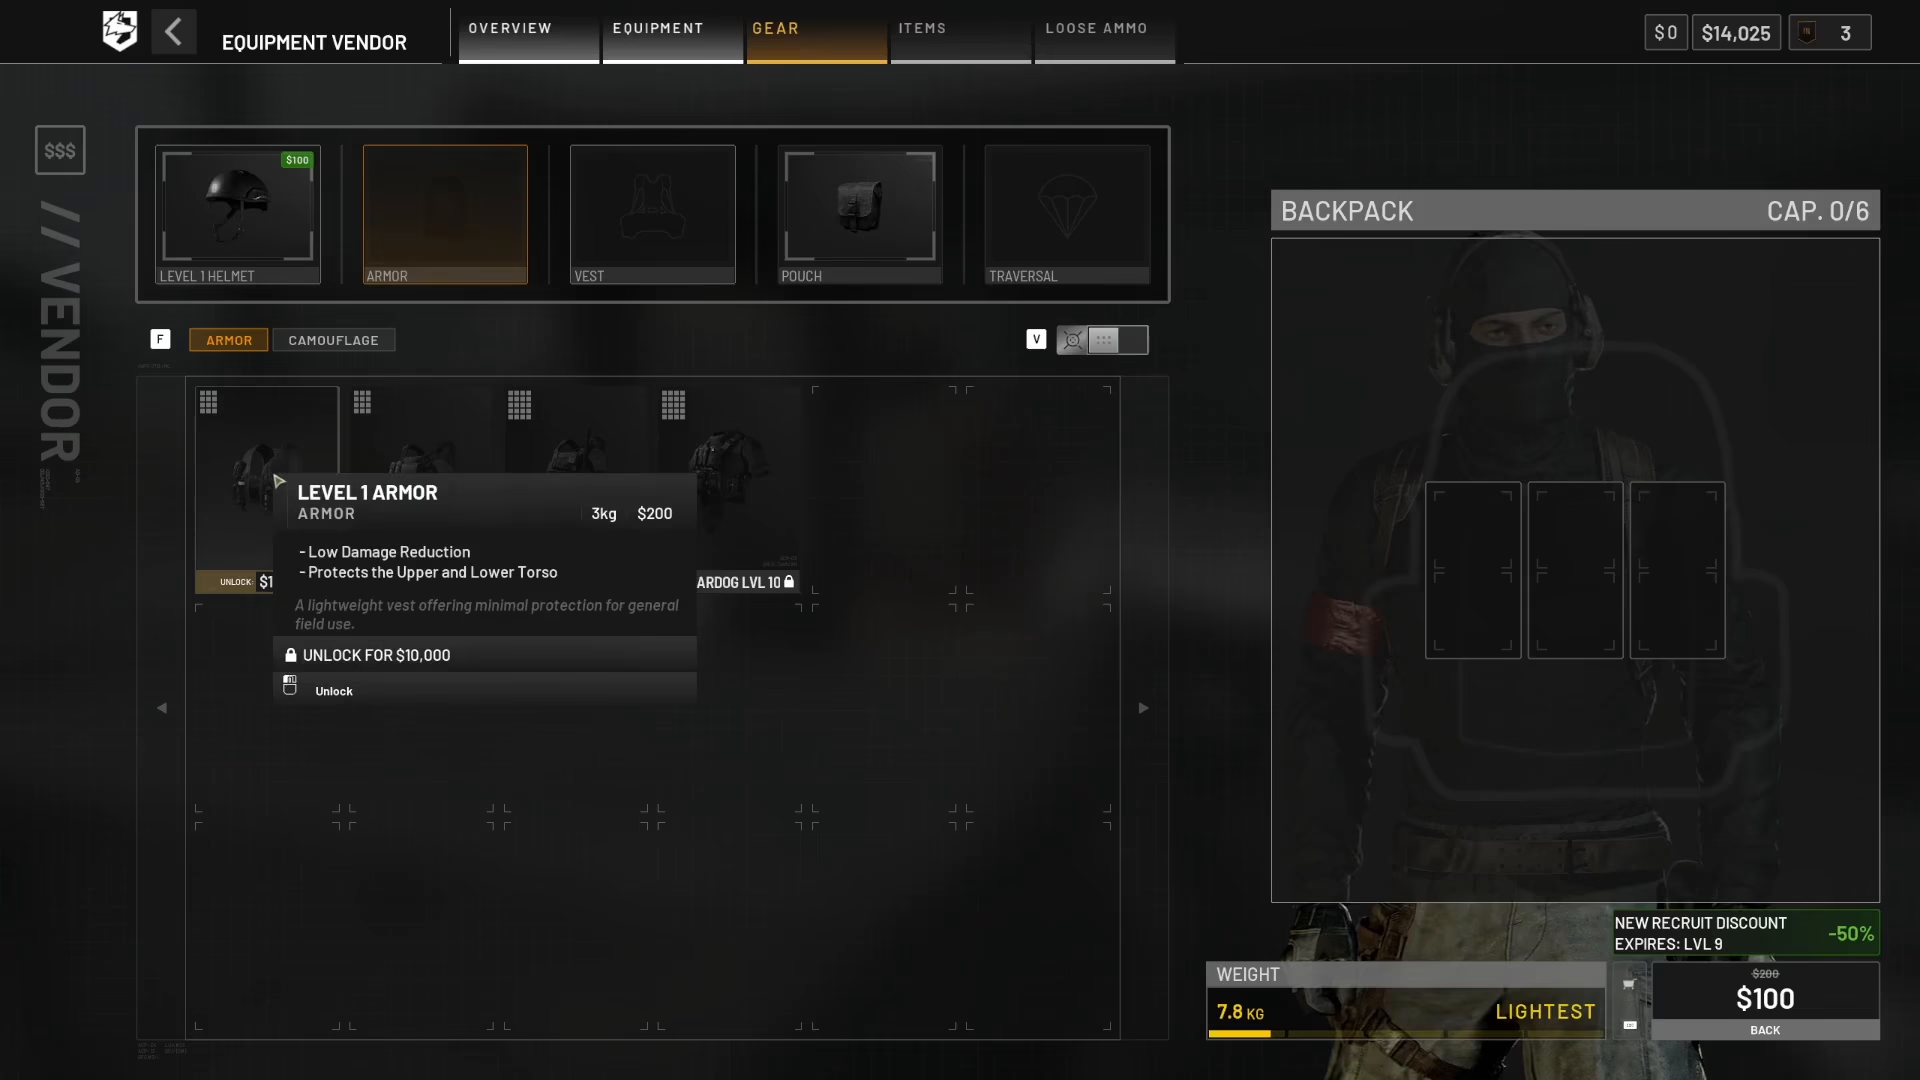
Start by selecting the helmet option. For beginners, Level 1 Helmet is a good starting point, offering low damage reduction. However, you must first unlock it for 10,000 credits before you can purchase individual units. Once unlocked, you can buy Level 1 helmets at a lower cost of a few hundred credits per unit.
Purchasing Body Armor
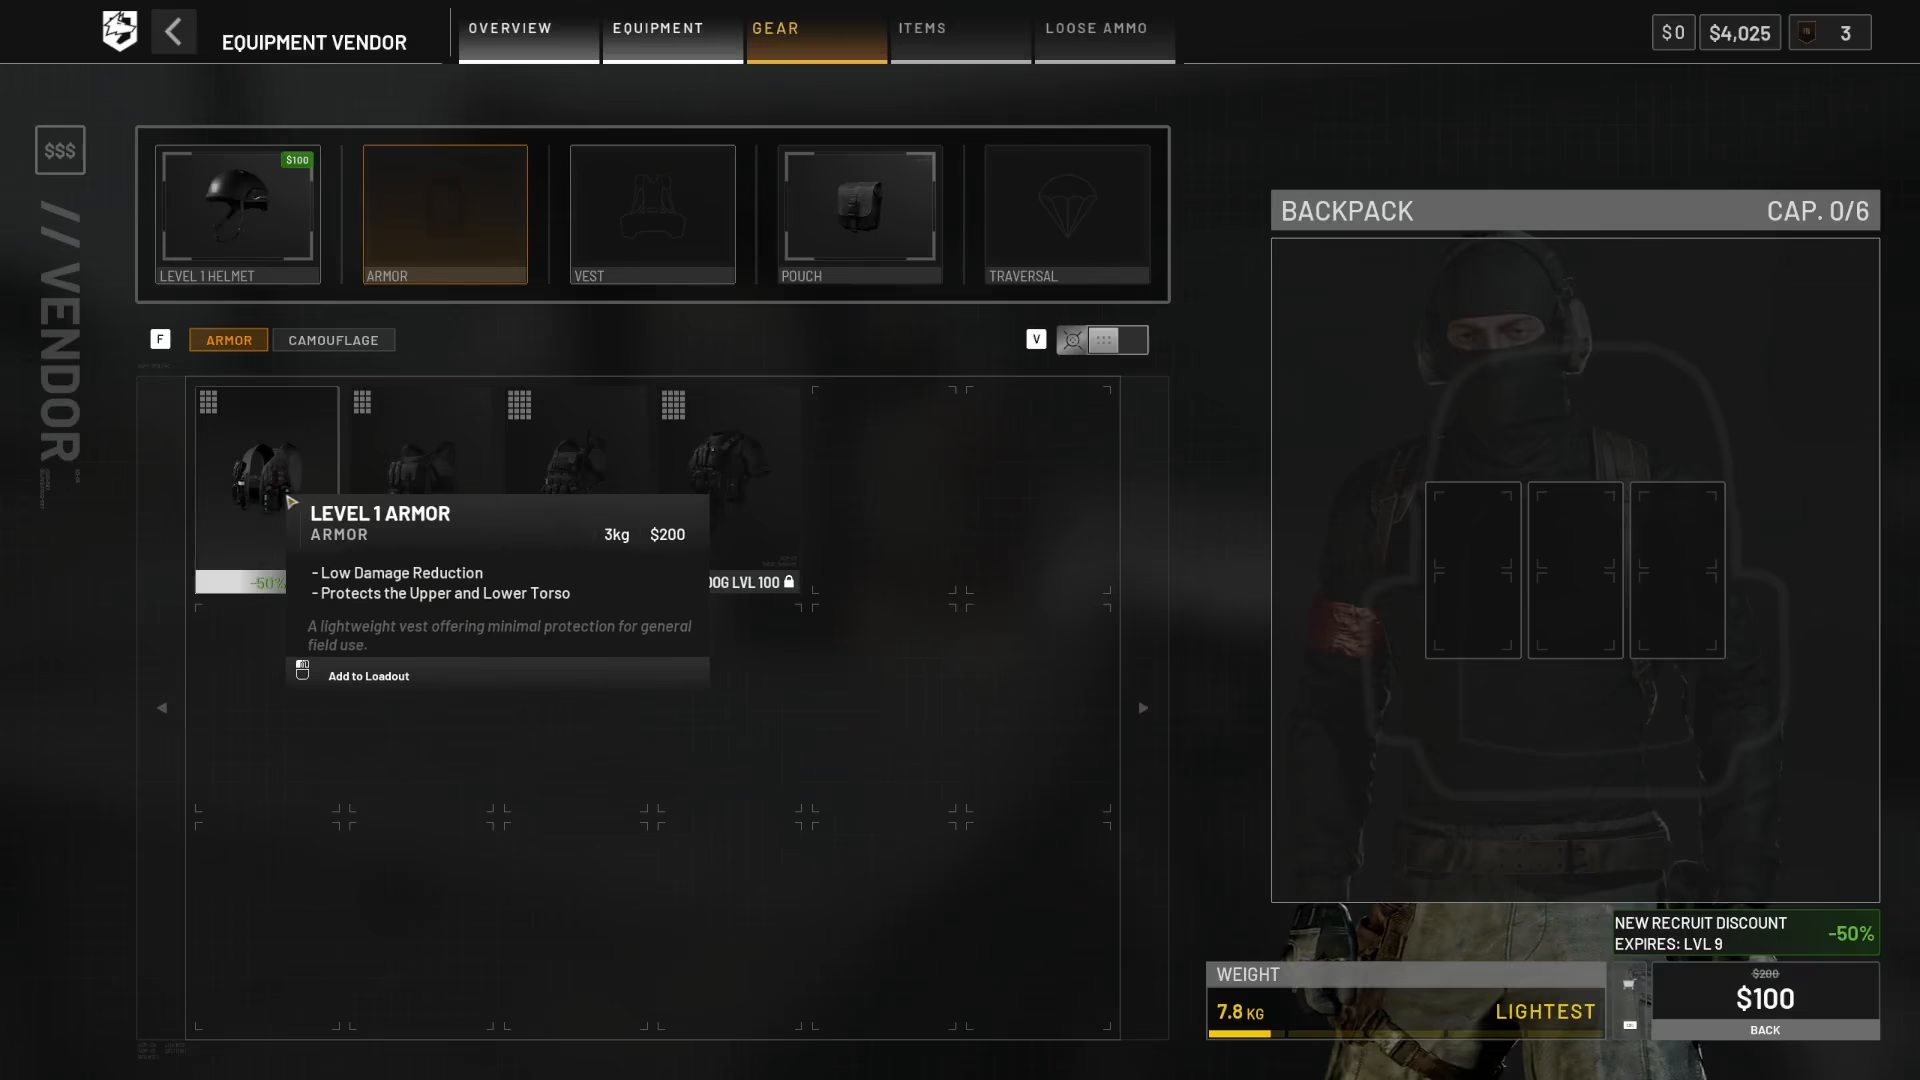
Next, select the Armour category. Level 1 Armour provides low damage reduction and protects your upper and lower torso—essential protection for the main body. Like the helmet, you may need to unlock this option first, then purchase individual pieces for a few hundred credits.
Additional Protective Gear
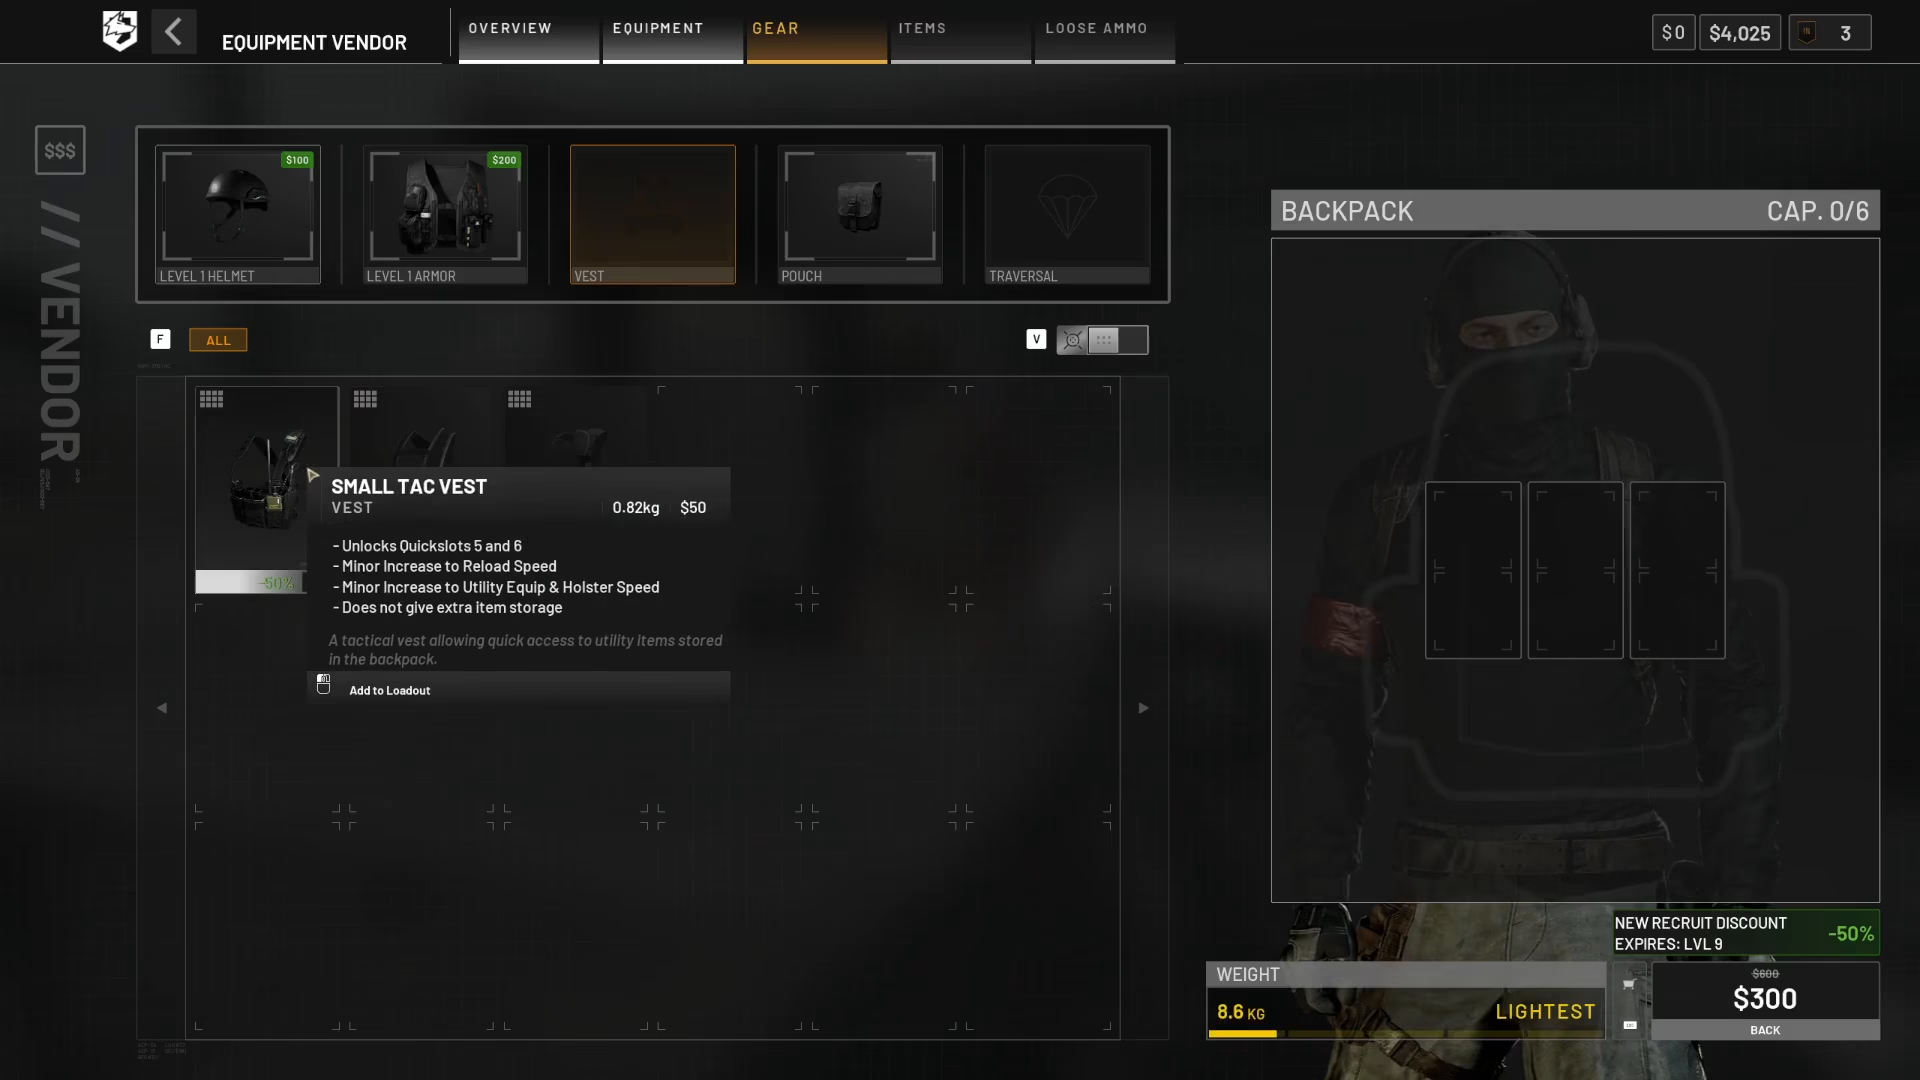
You can also equip a vest and other protective items depending on your budget and playstyle. Each piece adds incremental protection to different body parts.
Monitoring Your Weight and Load
An important consideration when selecting armor is weight. At the bottom of the gear menu, you’ll see a weight indicator labeled “lightest” that shows how heavy your current armor setup is. Heavier armor provides better protection but reduces your mobility and agility. Lighter armor allows for faster movement but offers less damage reduction. Strike a balance based on your preferred playstyle—whether you prioritize protection or speed.
Completing Your Purchase
Once you’ve selected all the armor pieces you want, review your selections on the left side of the menu under “Gear.” You’ll see everything you’ve chosen to purchase. When you’re satisfied with your loadout, locate the “Purchase” button in the bottom right-hand corner and click it to finalize your purchase.
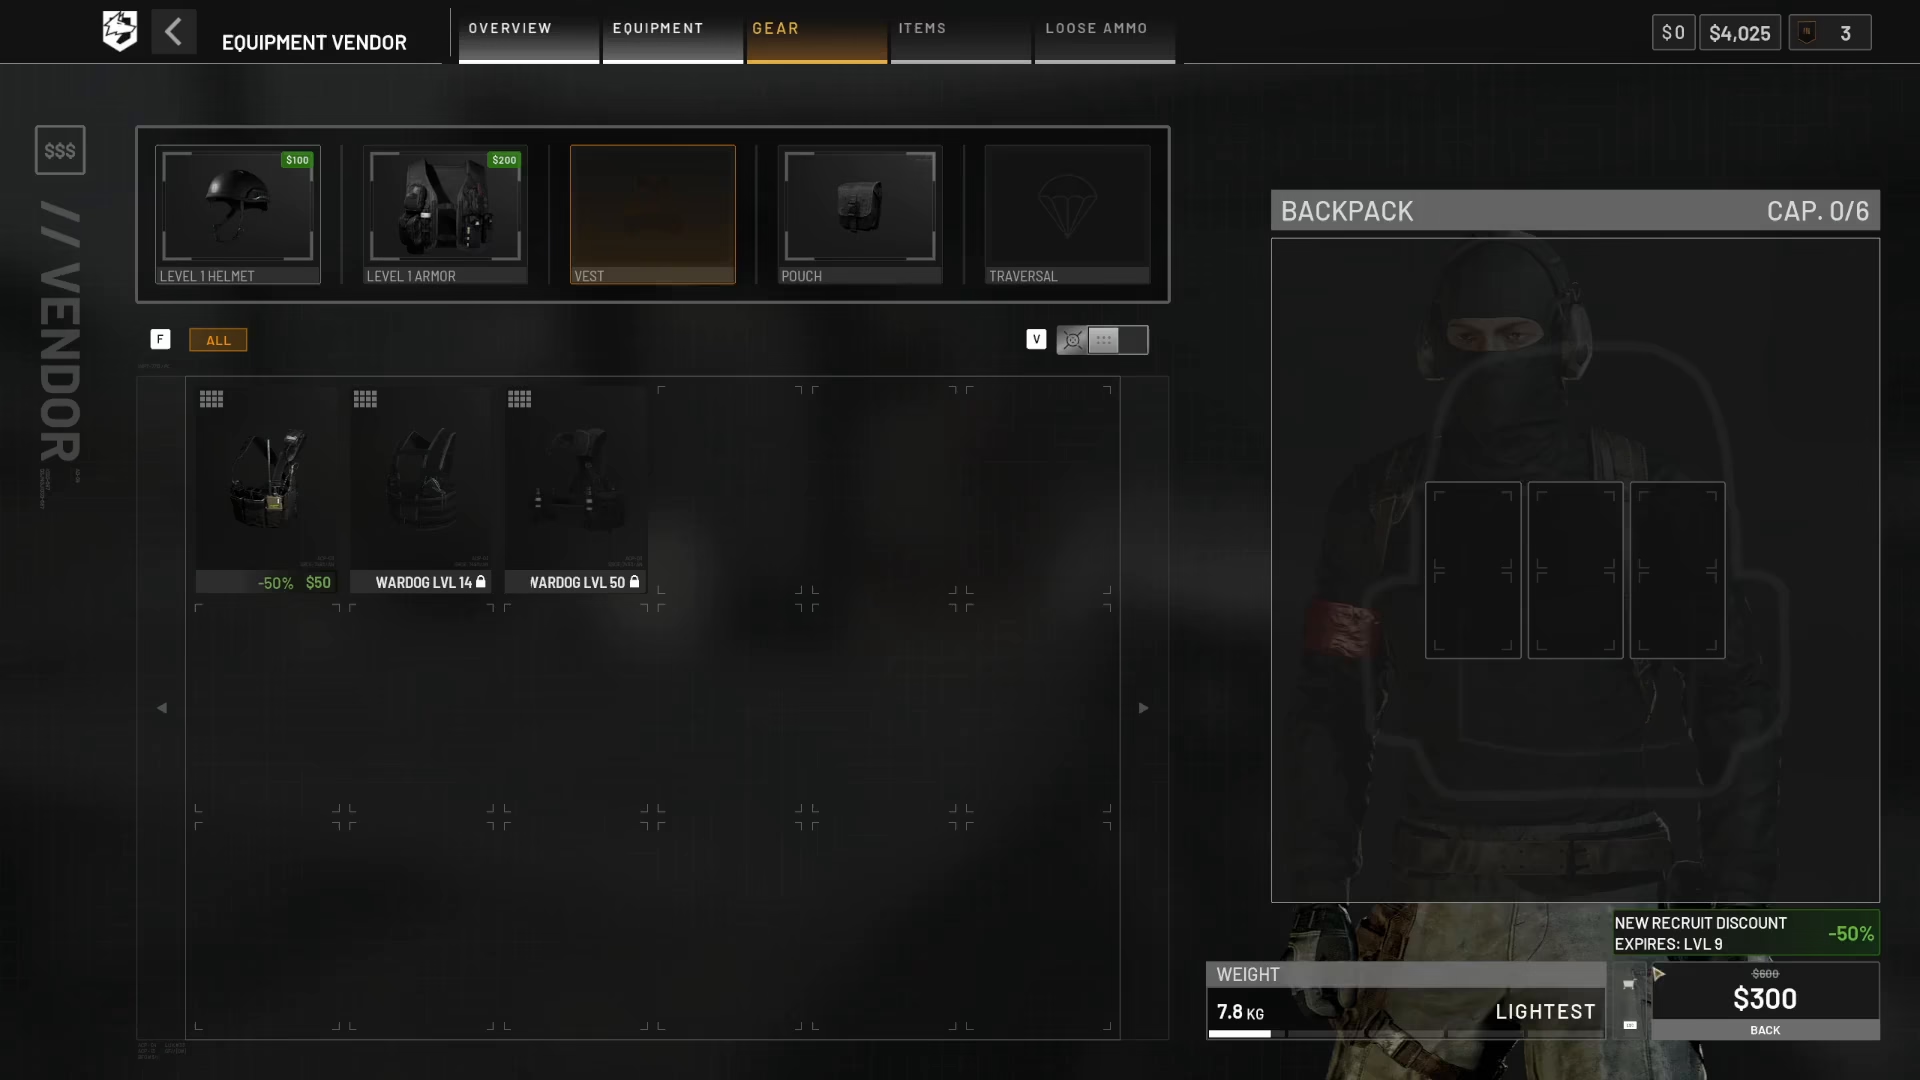
After completing the transaction, your new armor will be equipped and active. You’re now ready to enter combat with increased protection against incoming damage.
Summary
Getting armor in Wardogs is straightforward: visit the gun vendor at your spawn point, open the Gear menu, select from Helmet, Armour, Vest, and Pouch options, keep an eye on your weight balance, and purchase your selected items. With proper armor equipped, you’ll have a much better chance of surviving encounters with enemies. Don’t forget to subscribe and like for more Wardogs tips and tutorials!
— Want to Support? —
If you would like to help us continue making these guides – please consider joining our patreon here – https://www.patreon.com/c/JaviHeals
Alternatively – you can join our discord here – https://discord.gg/zD7Gjt6MHF