
How To Build & Use Food Districts In Frostpunk 2
How To Build & Use Food Districts In Frostpunk 2
Food districts are essential for keeping your colony fed and thriving in Frostpunk 2. In this guide, we’ll walk you through the complete process of building food districts, understanding their mechanics, and optimizing them for maximum efficiency. Whether you’re new to the game or looking to improve your food production strategy, this tutorial will cover everything you need to know.
Step 1: Frost Break the Area
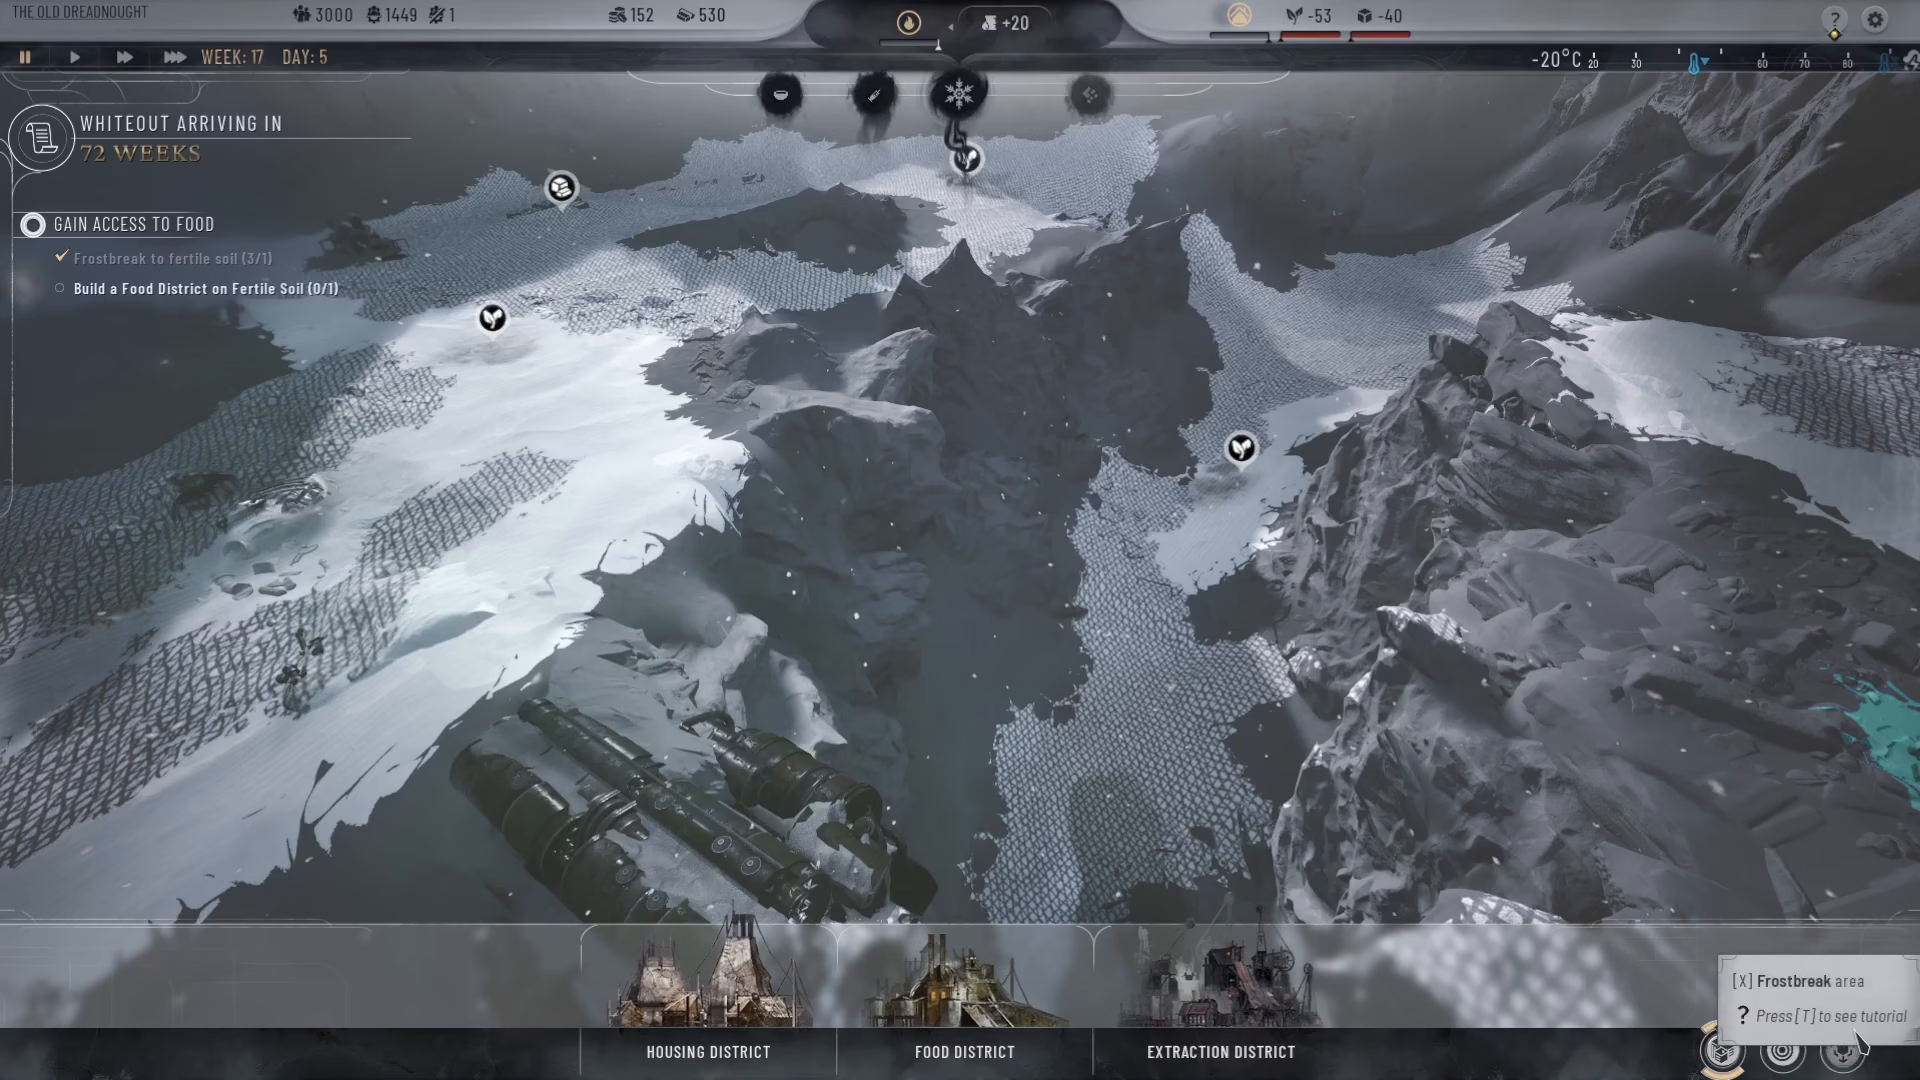
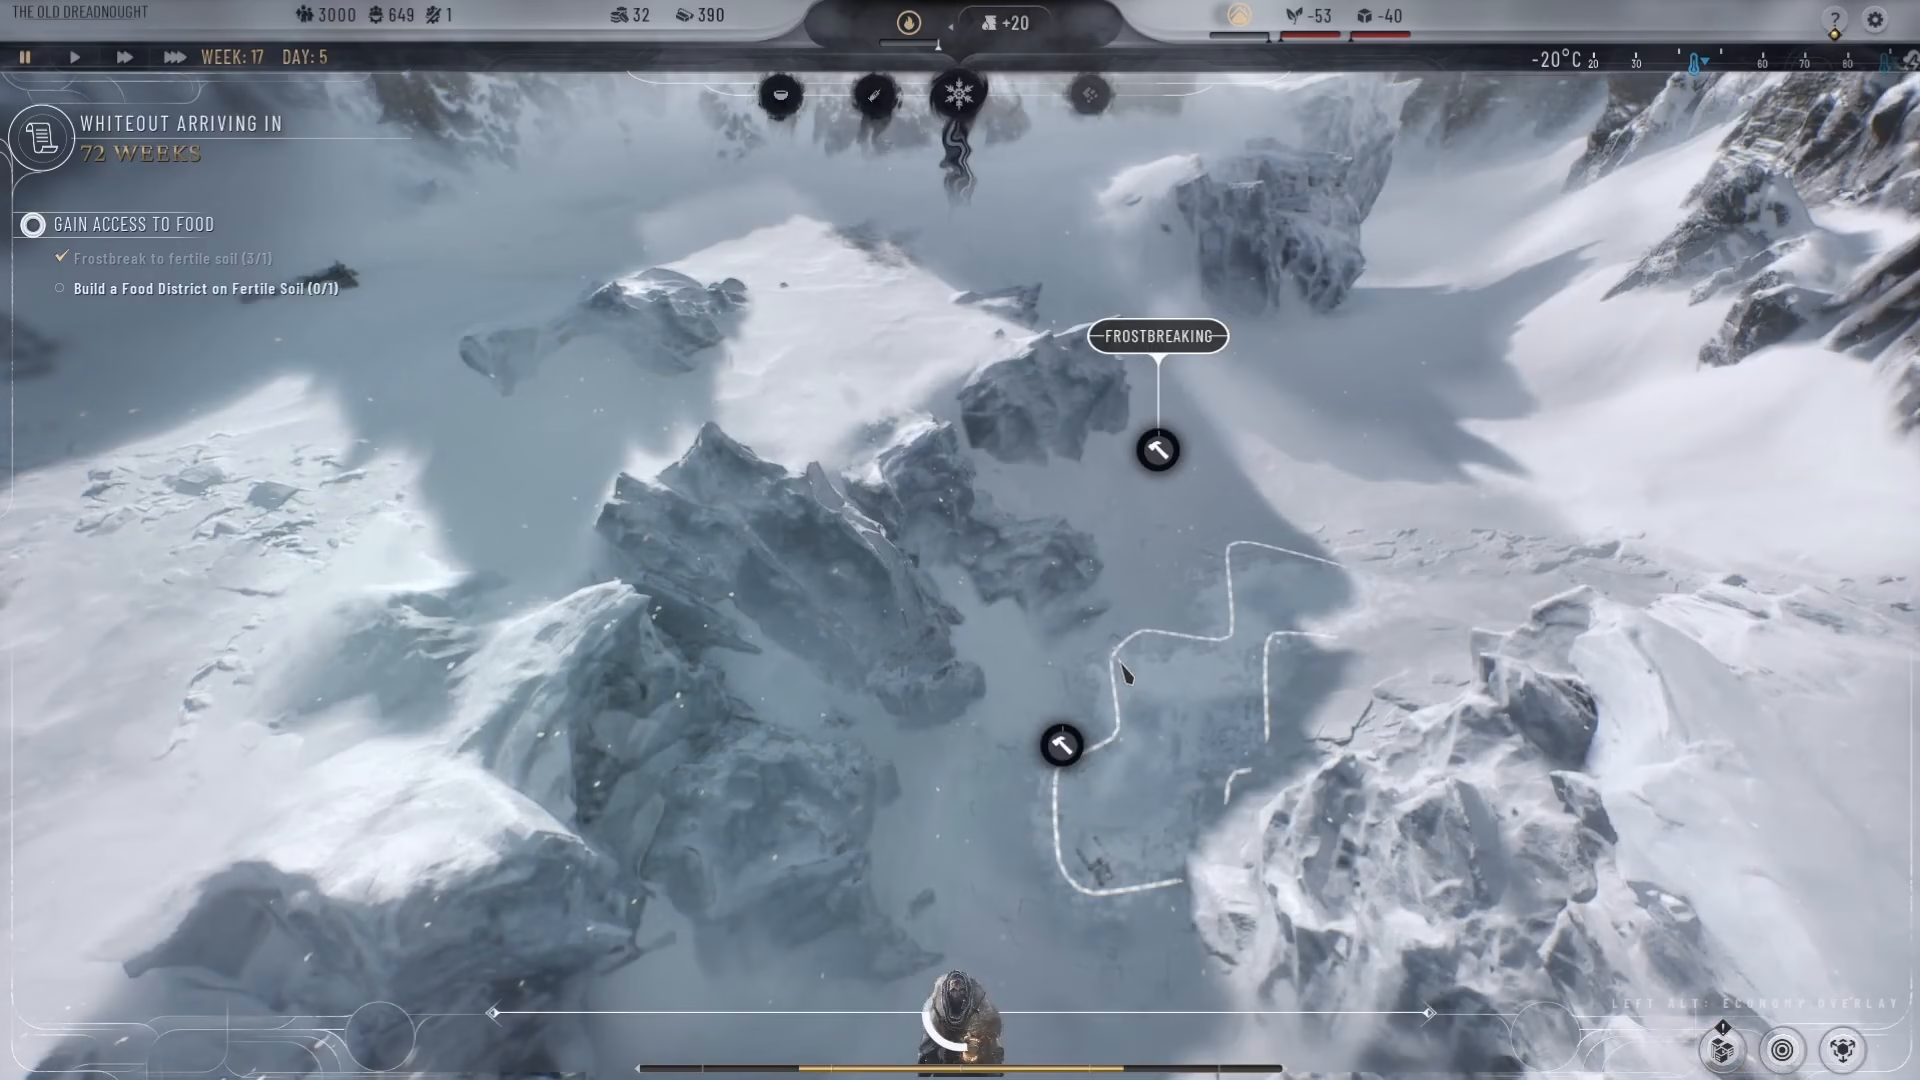
Before you can construct a food district, you need to frost break the cells where the farming land will be located. Look for the frost break button on the right-hand side of your screen. This will allow you to access fertile soil cells that are scattered across the map.
When frost breaking, you’ll want to work strategically around the map until you locate cells with fertile soil. Once you’ve identified a fertile soil cell, click on it and confirm with the tick button to frost break that cell. Repeat this process for all the fertile soil cells you plan to use for your food district.
Step 2: Construct the Food District
Once you’ve frost broken the necessary cells, navigate to the districts menu and select “food district.” Before placing your district, review the construction requirements:
Workforce Cost: 200 workforce members
Materials: Pre-fabs and scraps (raw materials)
Ongoing Workforce: 200 members to keep the district running
Heat & Materials Demand: Ongoing heat and material consumption
Food Output: 45 to 80 food per cycle (varies based on fertile soil quality)
The food district will gross food from fertile soil and prepare it for consumption. Select the fertile soil cells where you want to place the district (you can select multiple cells at once by clicking each one) and confirm your placement with the tick button. The construction will begin automatically.
Step 3: Understanding Food District Information
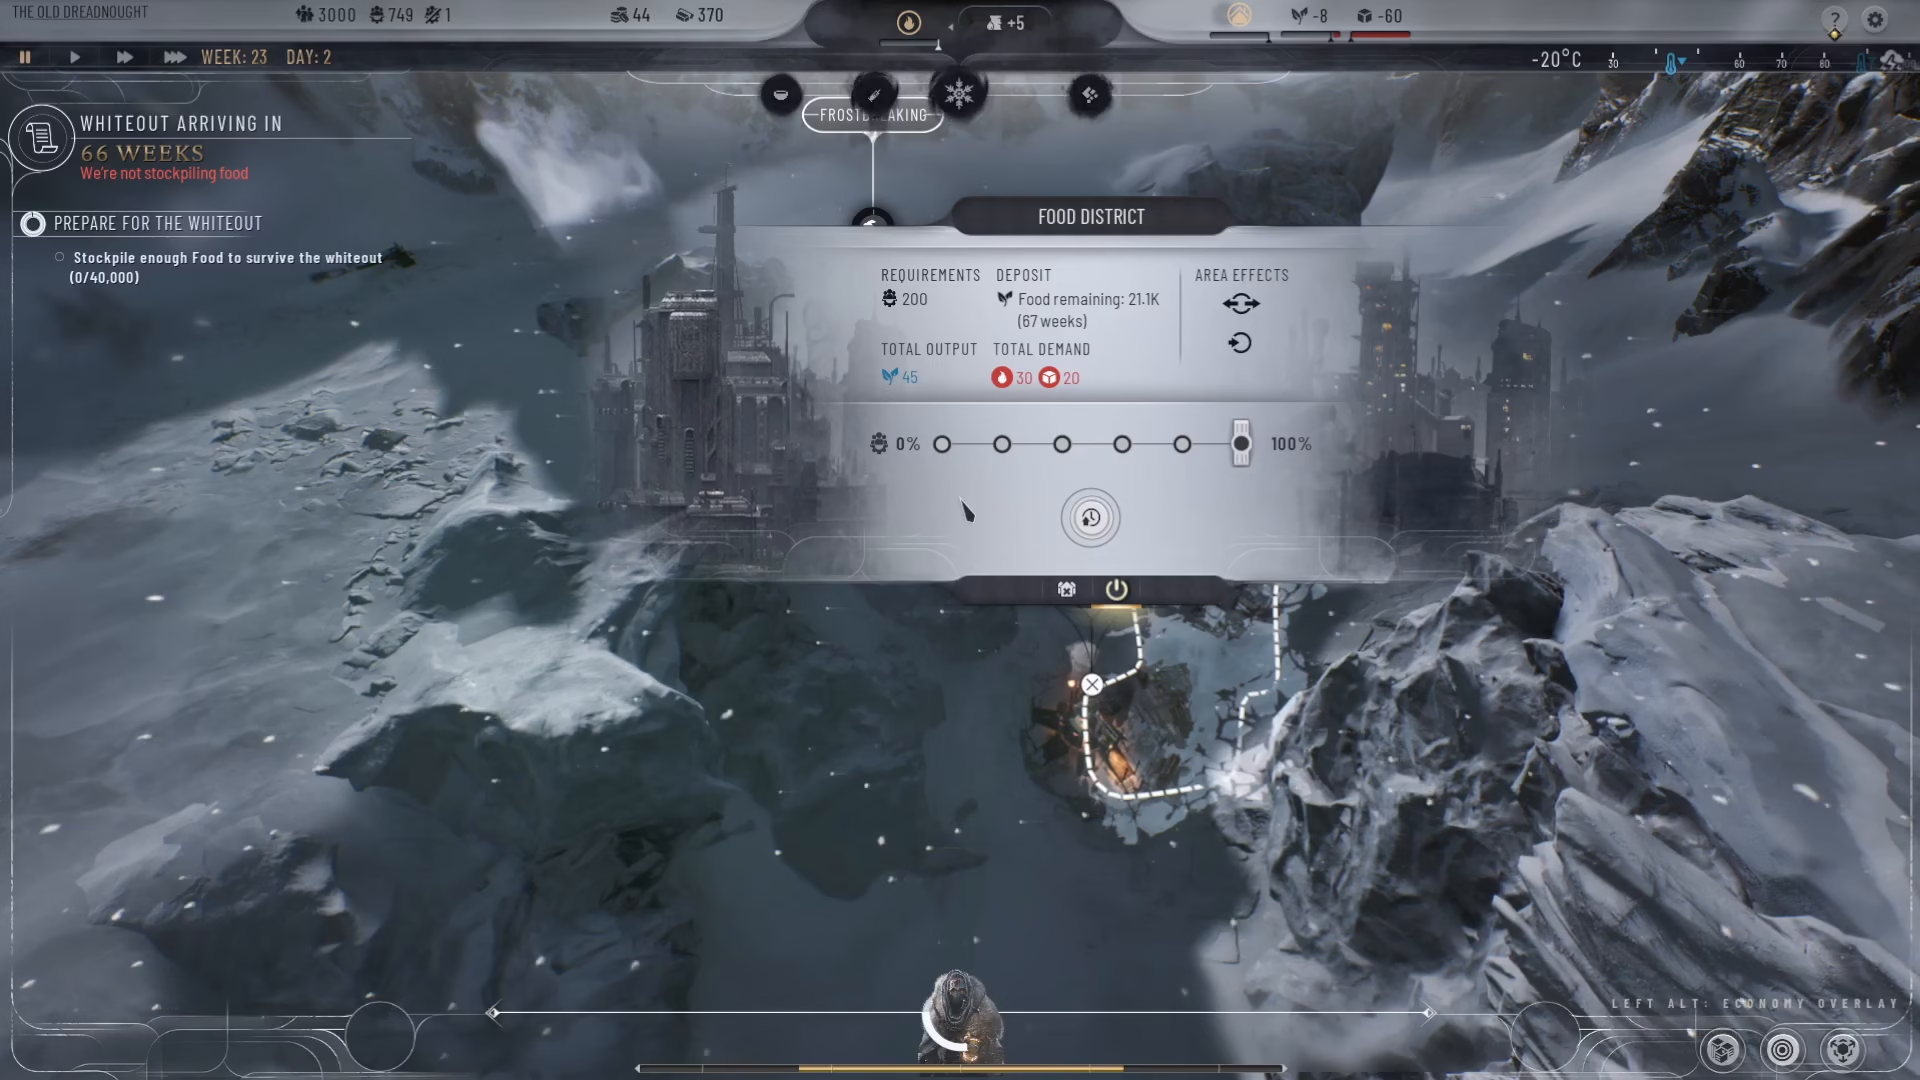
Once your food district is built, click on it to view detailed information about its operation. Here’s what you’ll see:
Workforce & Production Details
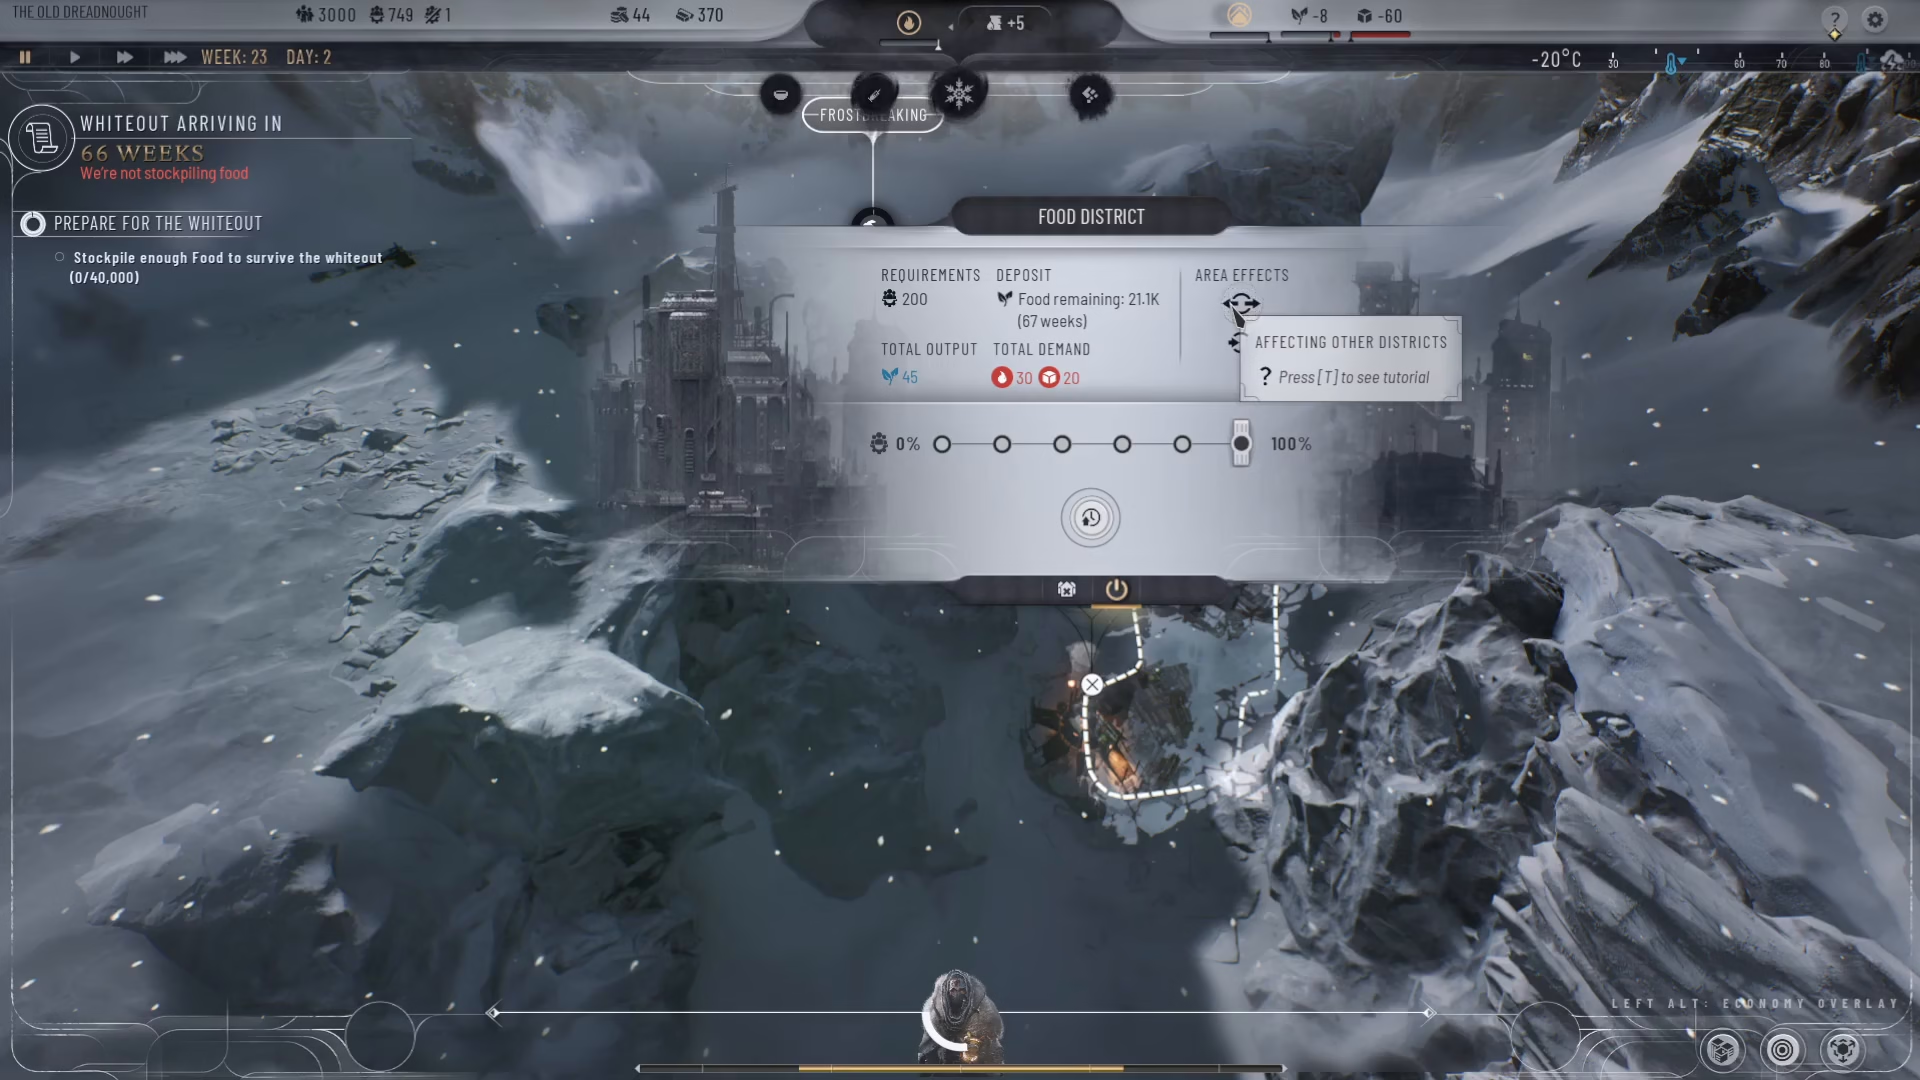
The district requires 200 workforce members to operate. You can view how much food remains in the district and estimate how long it will last (in this example, approximately 67 weeks). The base food output is displayed—in our case, 45 food per cycle.
Food Supply Overview
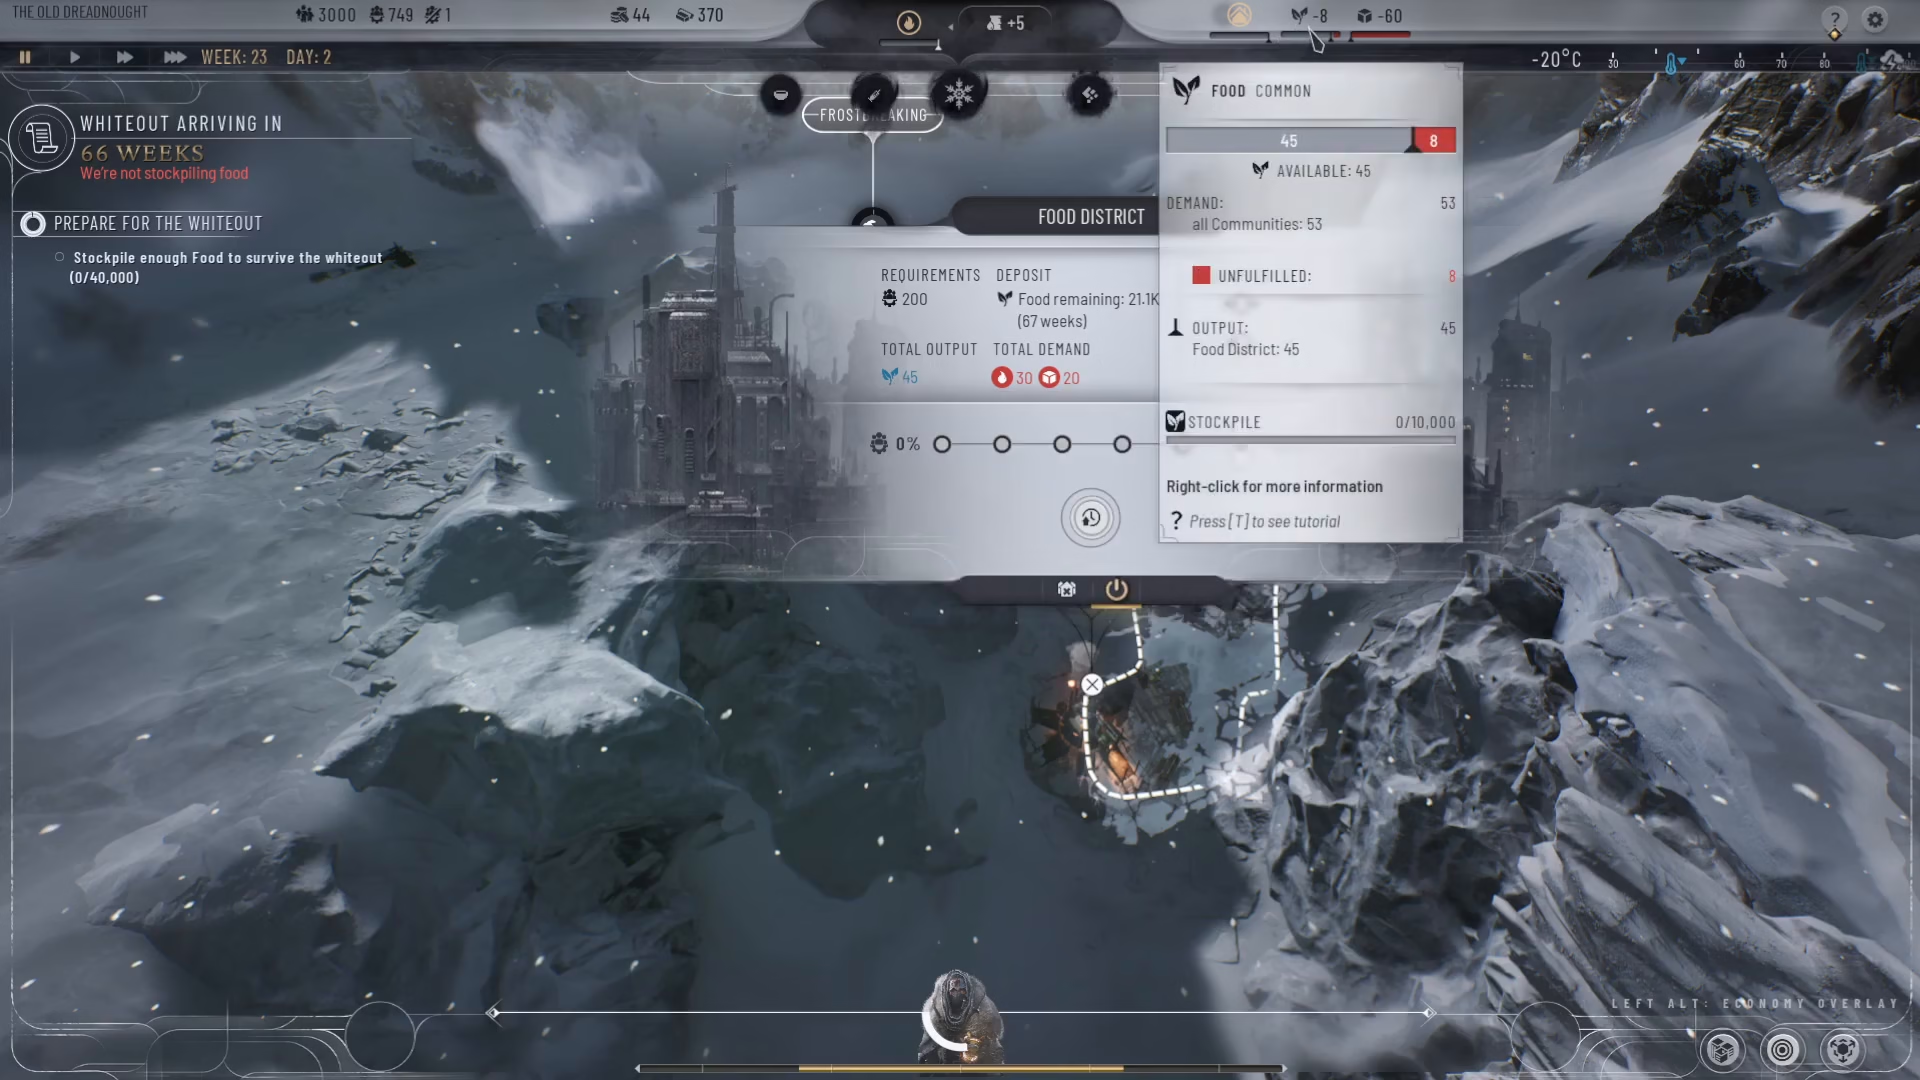
At the top of your screen, you can see your overall food situation under “food available.” This shows your current production rate. Compare this to your total food requirements to understand if you have a surplus or deficit. For example, if you’re producing 45 food but your colony needs 53 food, you have a deficit of 8 food—meaning you’ll need to build additional food districts.
You can also view your food stockpile at the bottom (shown as current amount out of maximum capacity, for example 0 out of 10,000). This stockpile represents the total food you’ve accumulated that exceeds immediate needs.
Step 4: Managing Area Effects
The food district information panel shows two important sections for area effects:
Area Effects: Shows if the food district is affecting any nearby districts
Nearby Effects: Shows if other districts are affecting this food district (for example, heat from nearby housing districts)
Understanding these interactions helps you plan your district layouts more effectively and maximize efficiency.
Step 5: Optimize Food Production
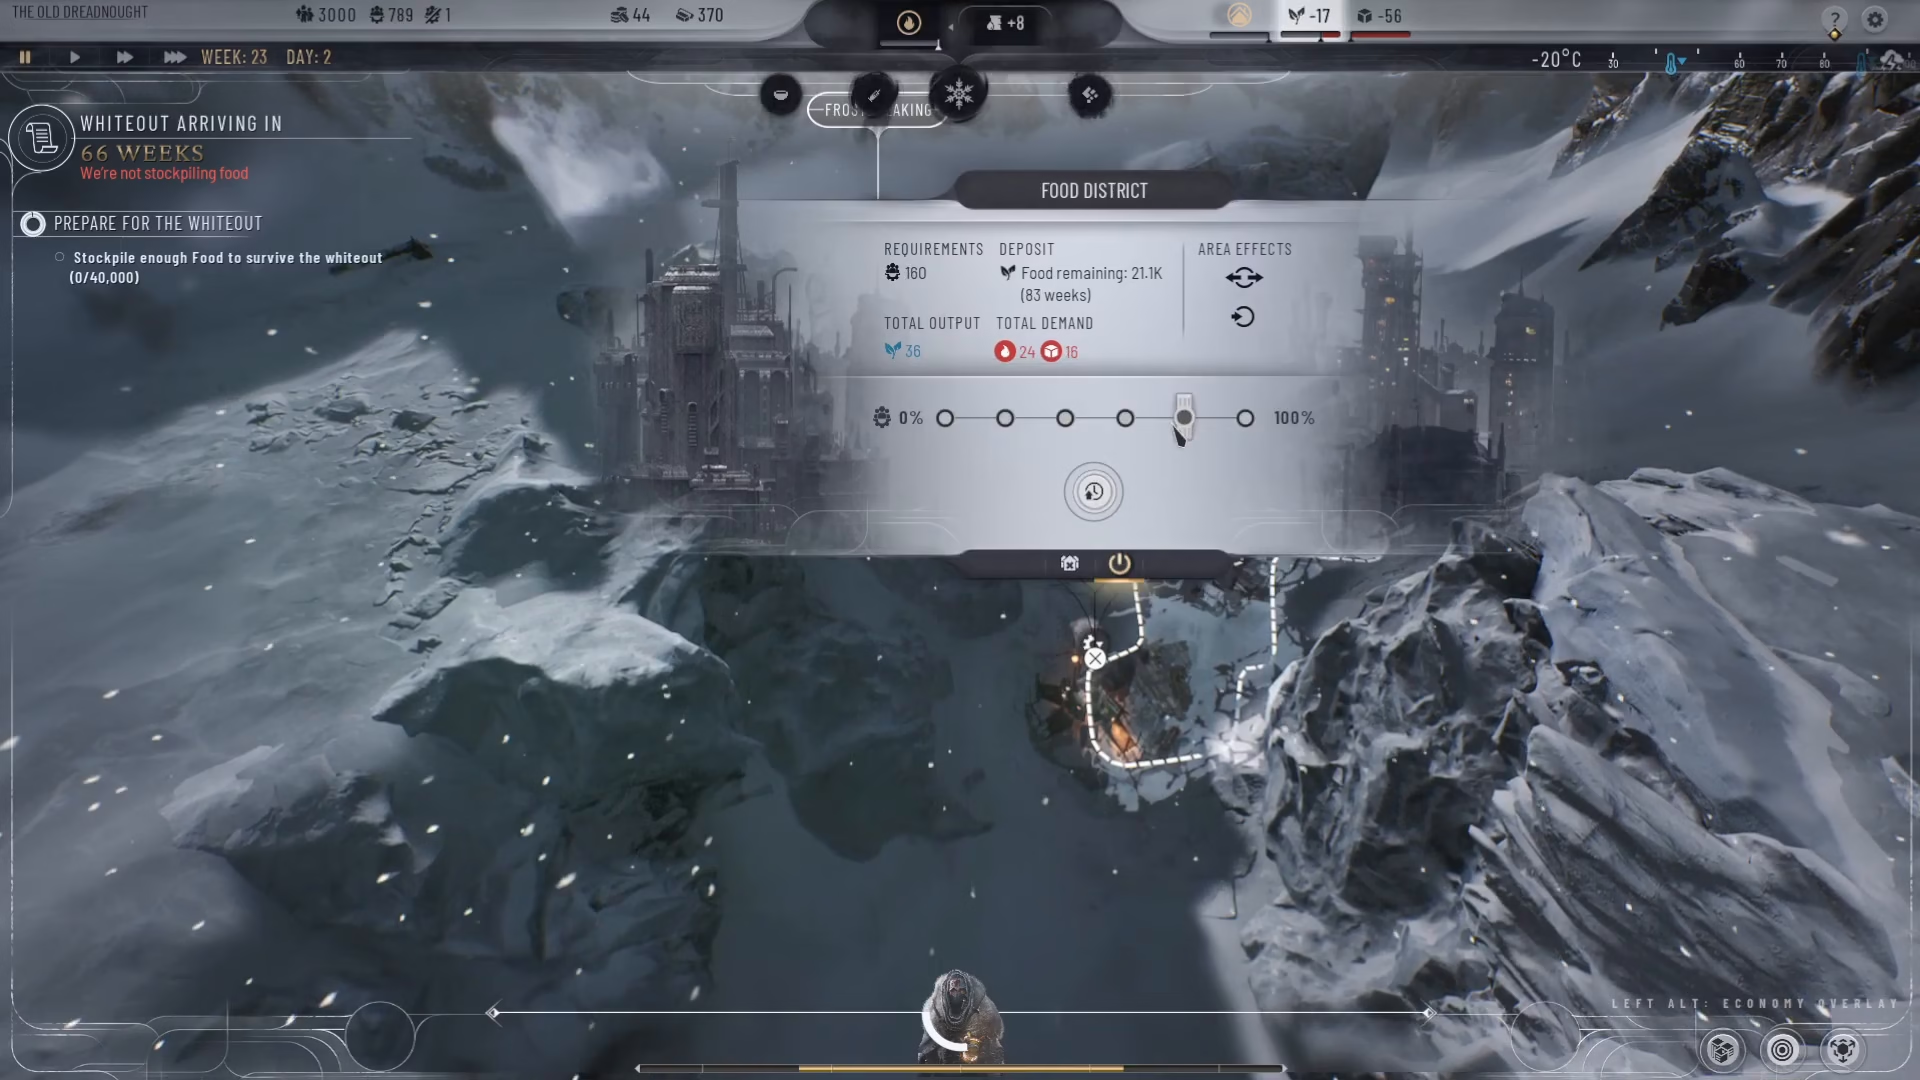
You can fine-tune your food district’s output by adjusting its heat and materials demand. The panel displays a slider that allows you to reduce the heat and materials consumption, though this will also reduce your food production. You can drag the slider all the way down to zero to completely turn off the district if needed.
This flexibility is useful when you have excess food production and want to save on resources, or when you need to redirect workforce and materials to other critical operations in your colony.
Step 6: Dismantling & Resource Recovery
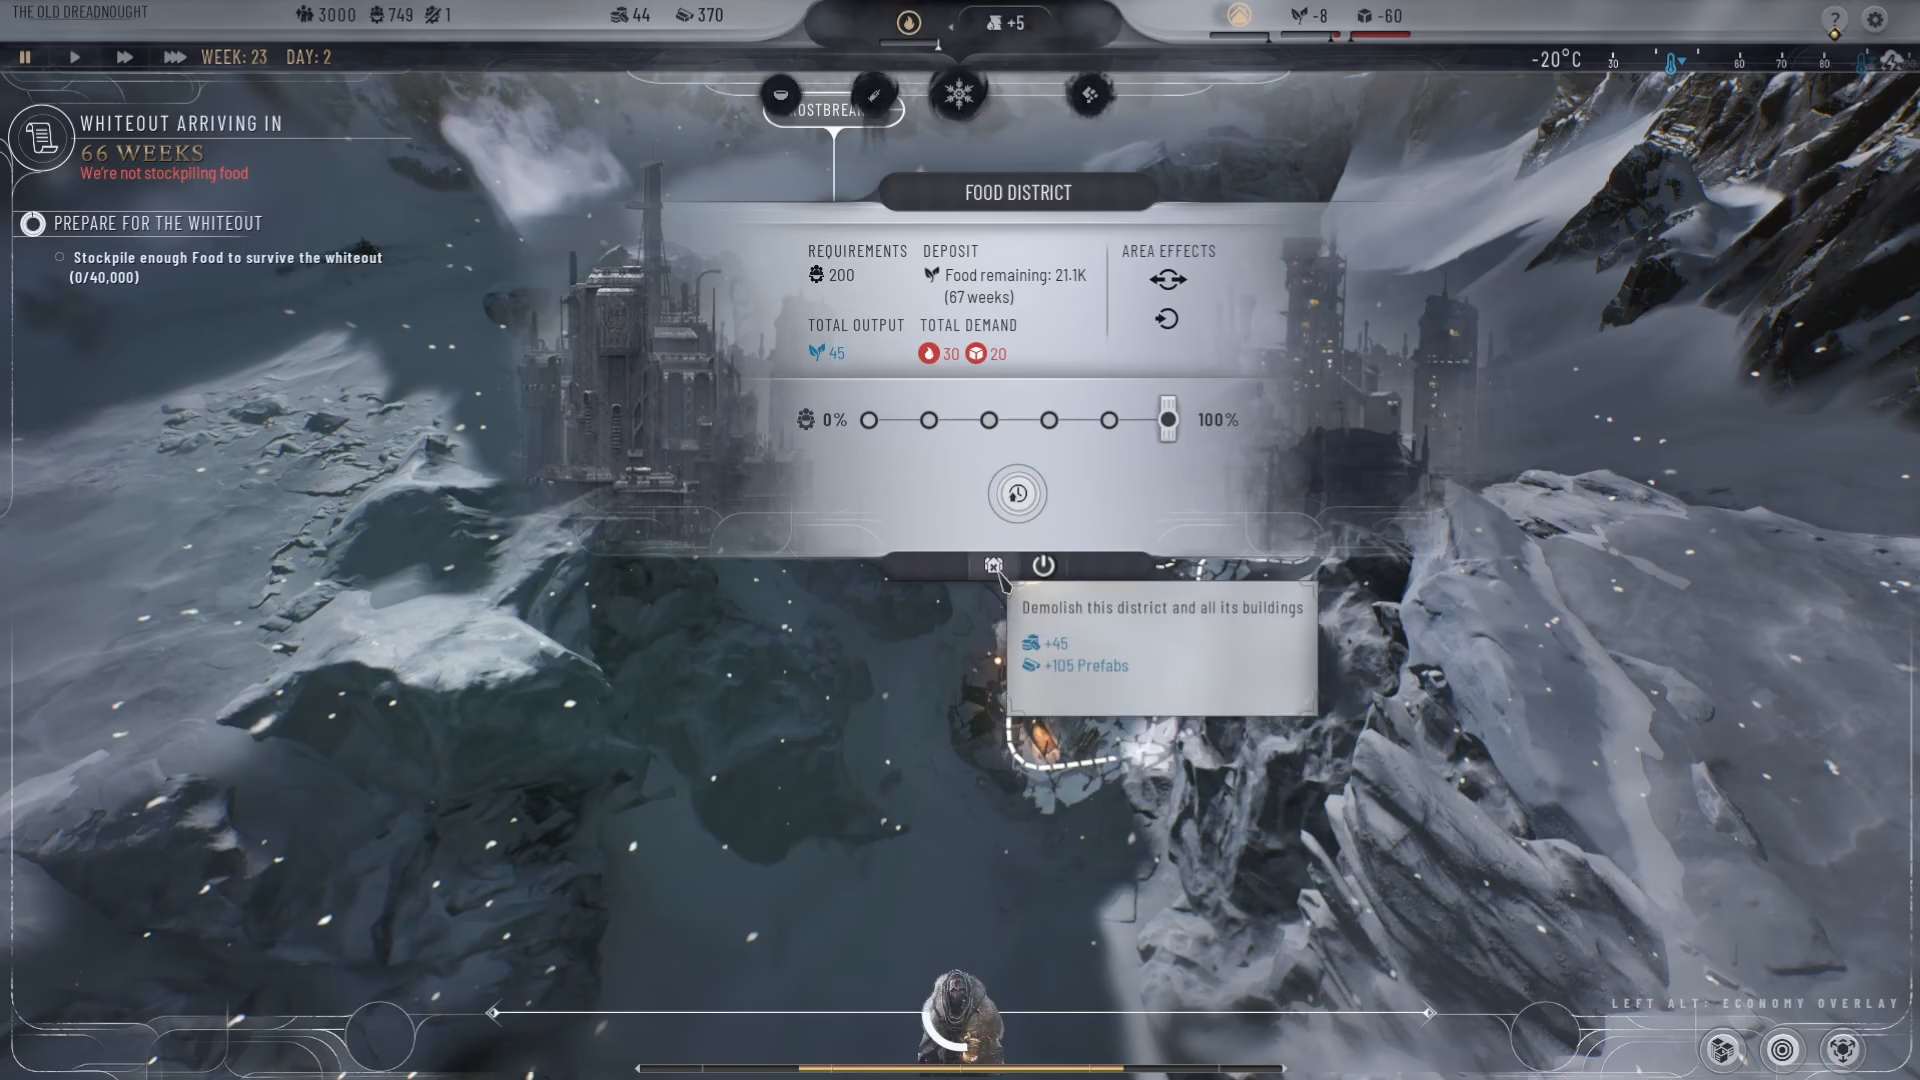
If you need to remove a food district, you can dismantle it and recover some of the resources you invested in its construction. This is particularly useful once you’ve exhausted the fertile soil resources in that location or when you need to reallocate space for other districts. Simply use the dismantle option and you’ll receive a partial refund of materials and pre-fabs.
Conclusion
Building and managing food districts in Frostpunk 2 is a straightforward process once you understand the mechanics. Remember to frost break fertile soil first, construct districts with adequate workforce, monitor your food supply versus demand, and optimize your districts based on your colony’s needs. With proper planning and management, you’ll ensure your population never goes hungry and your colony survives the frozen wasteland.
— Want to Support? —
If you would like to help us continue making these guides – please consider joining our patreon here – https://www.patreon.com/c/JaviHeals
Alternatively – you can join our discord here – https://discord.gg/zD7Gjt6MHF