






How To Disable Vsync In Fallout 4
How To Disable VSync In Fallout 4
VSync (Vertical Sync) can sometimes limit your frame rate in Fallout 4, causing performance issues for some players. If you want to disable VSync to improve your gaming experience, follow this straightforward guide. We’ll walk you through editing your Fallout 4 configuration files to turn off VSync in just a few simple steps.
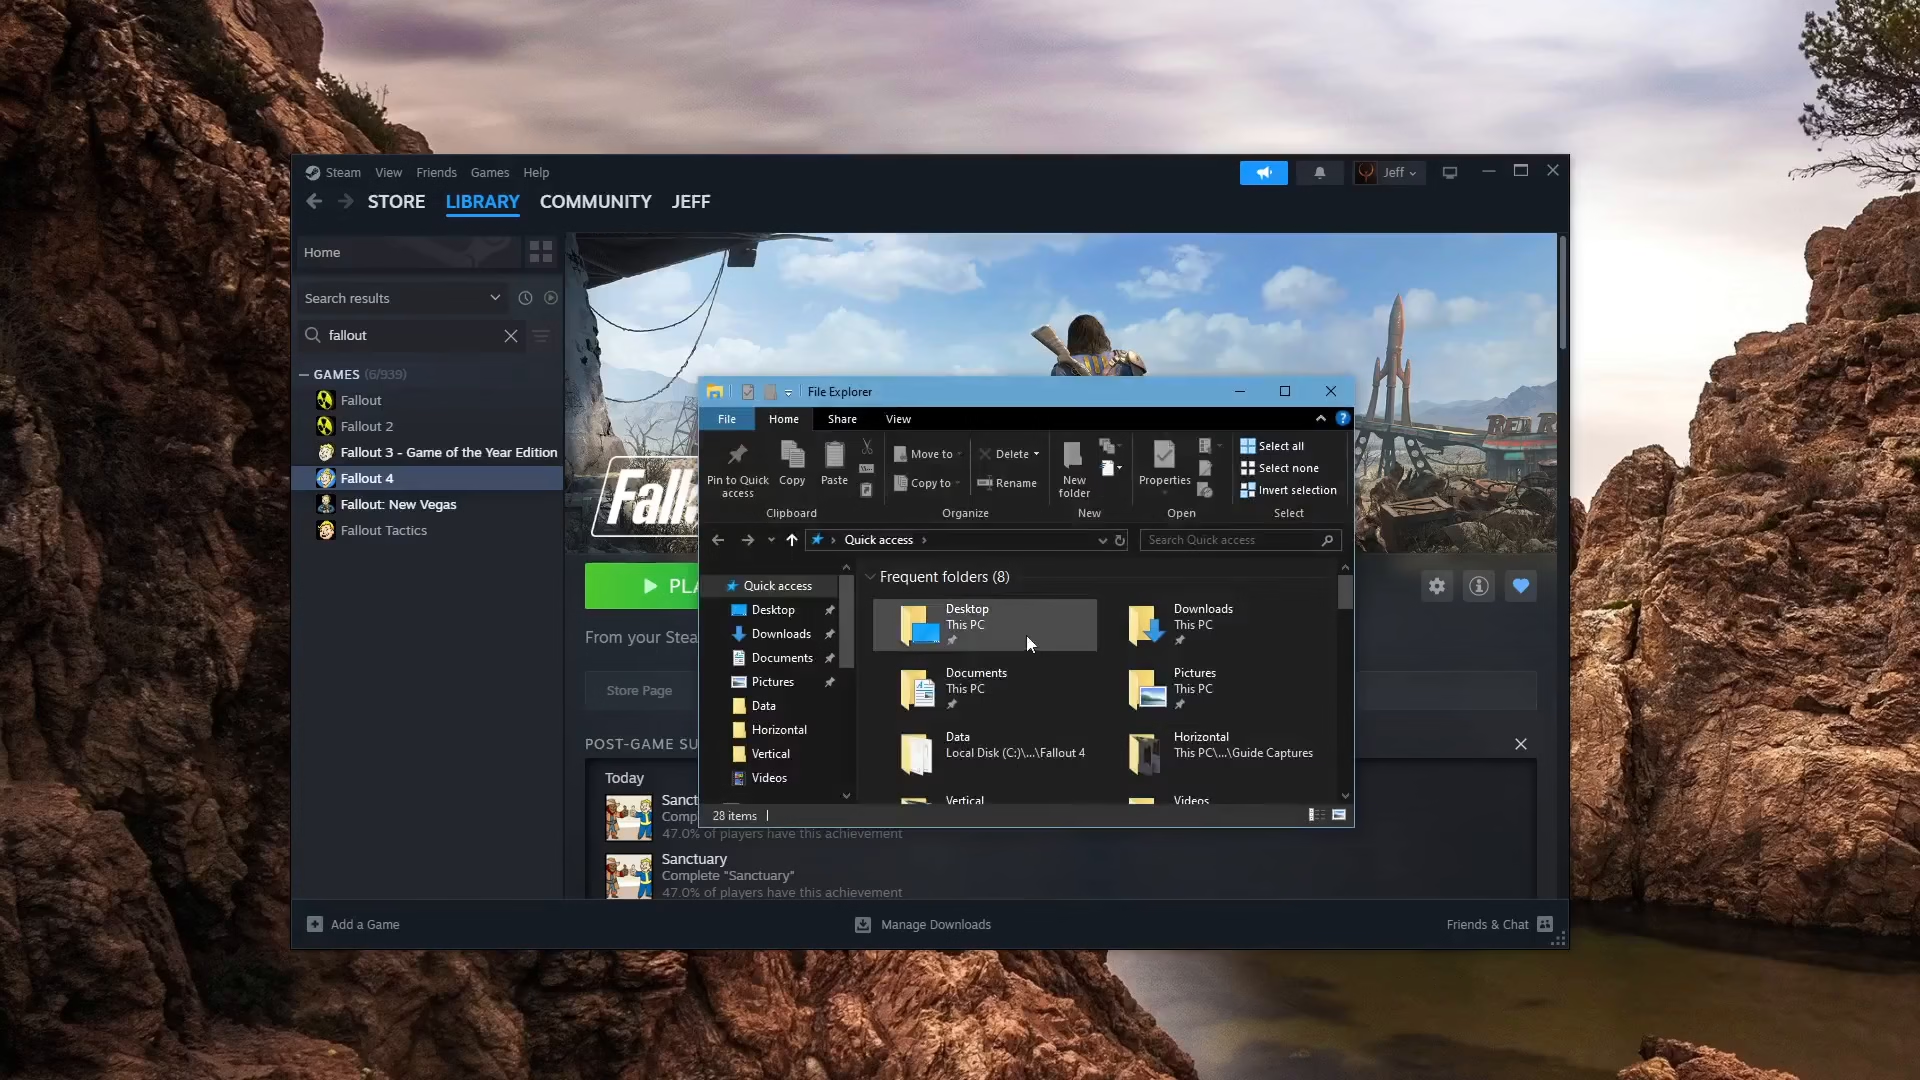
Step 1: Open File Explorer and Navigate to Your Fallout 4 Folder
Start by opening File Explorer on your computer. Navigate to your Documents folder, then to My Games, and finally to the Fallout 4 directory. This is where your game configuration files are stored.
Step 2: Locate Your Configuration Files
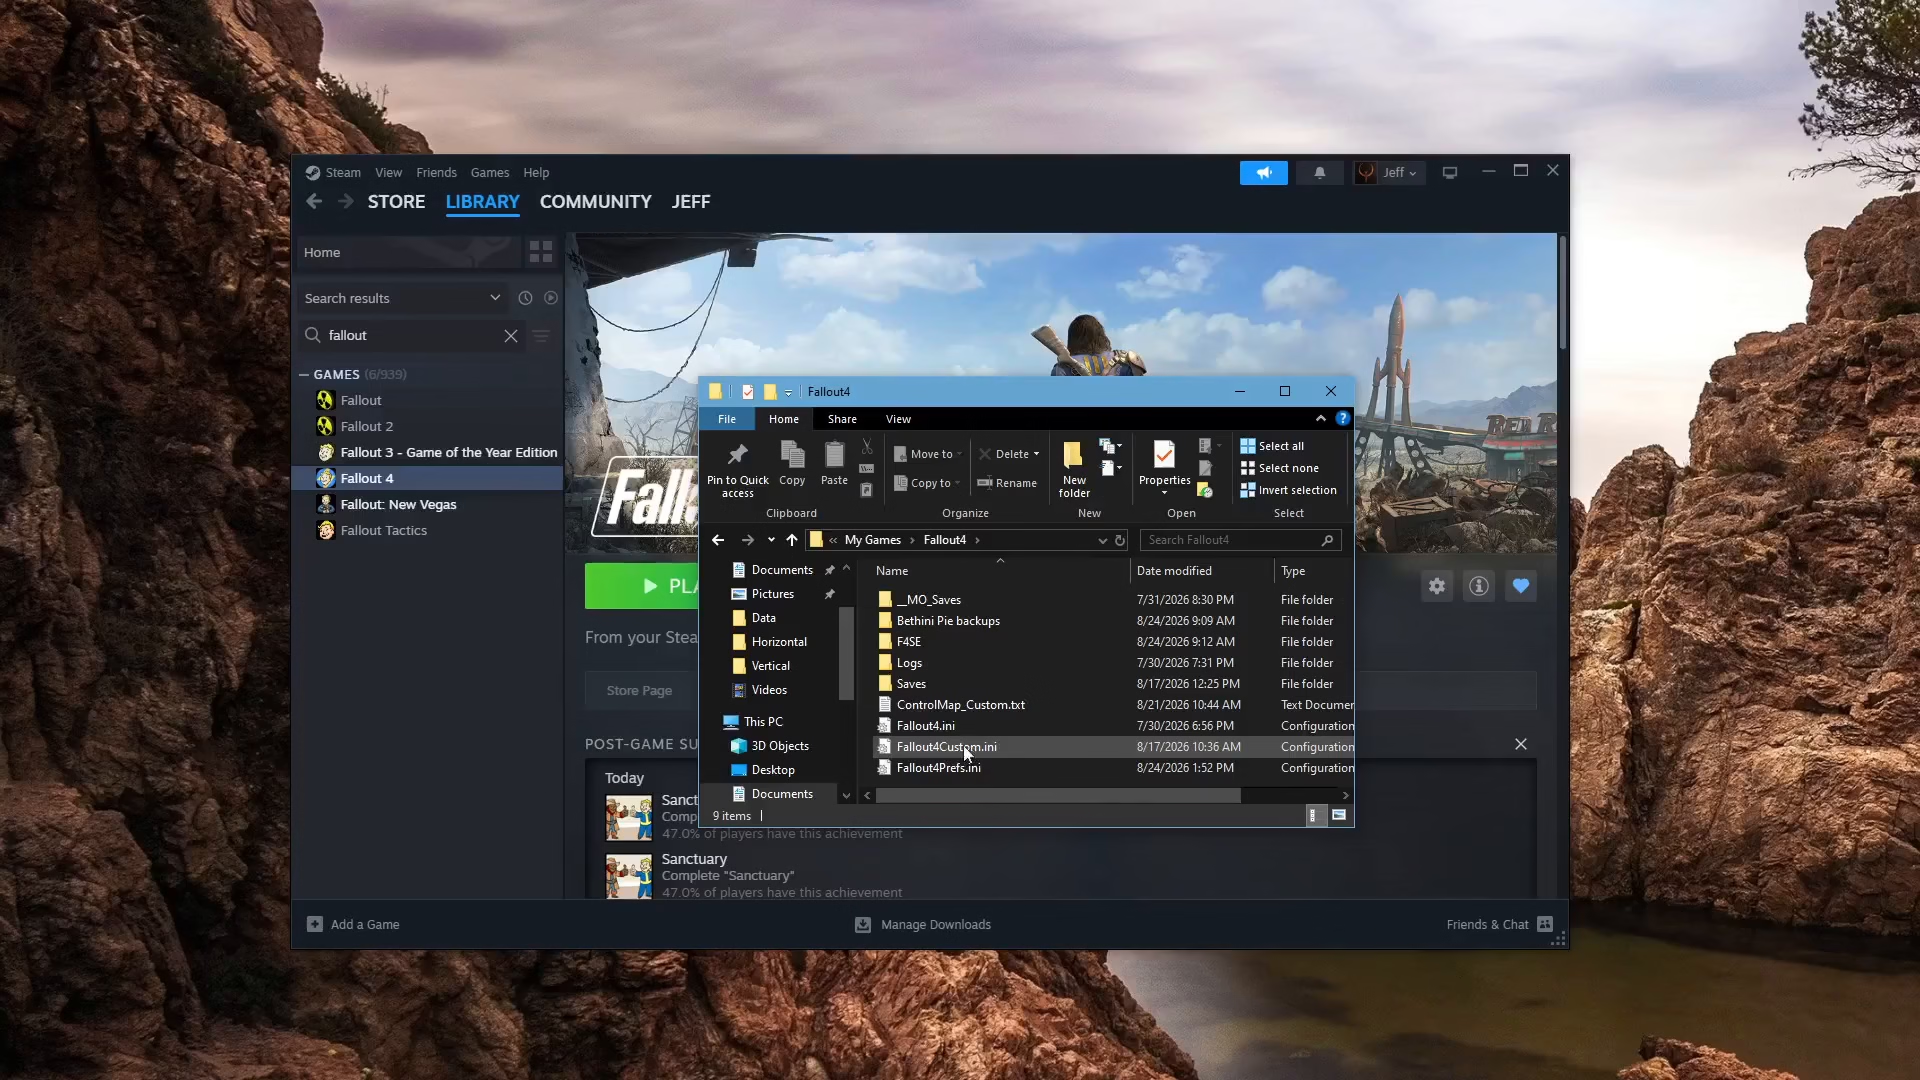
Inside your Fallout 4 folder, you’ll find several configuration files:
Fallout4.ini
Fallout4Prefs.ini
Fallout4Custom.ini (if you’re using Mod Organizer)
We’ll need to edit two of these files to fully disable VSync.
Step 3: Edit Fallout4.ini
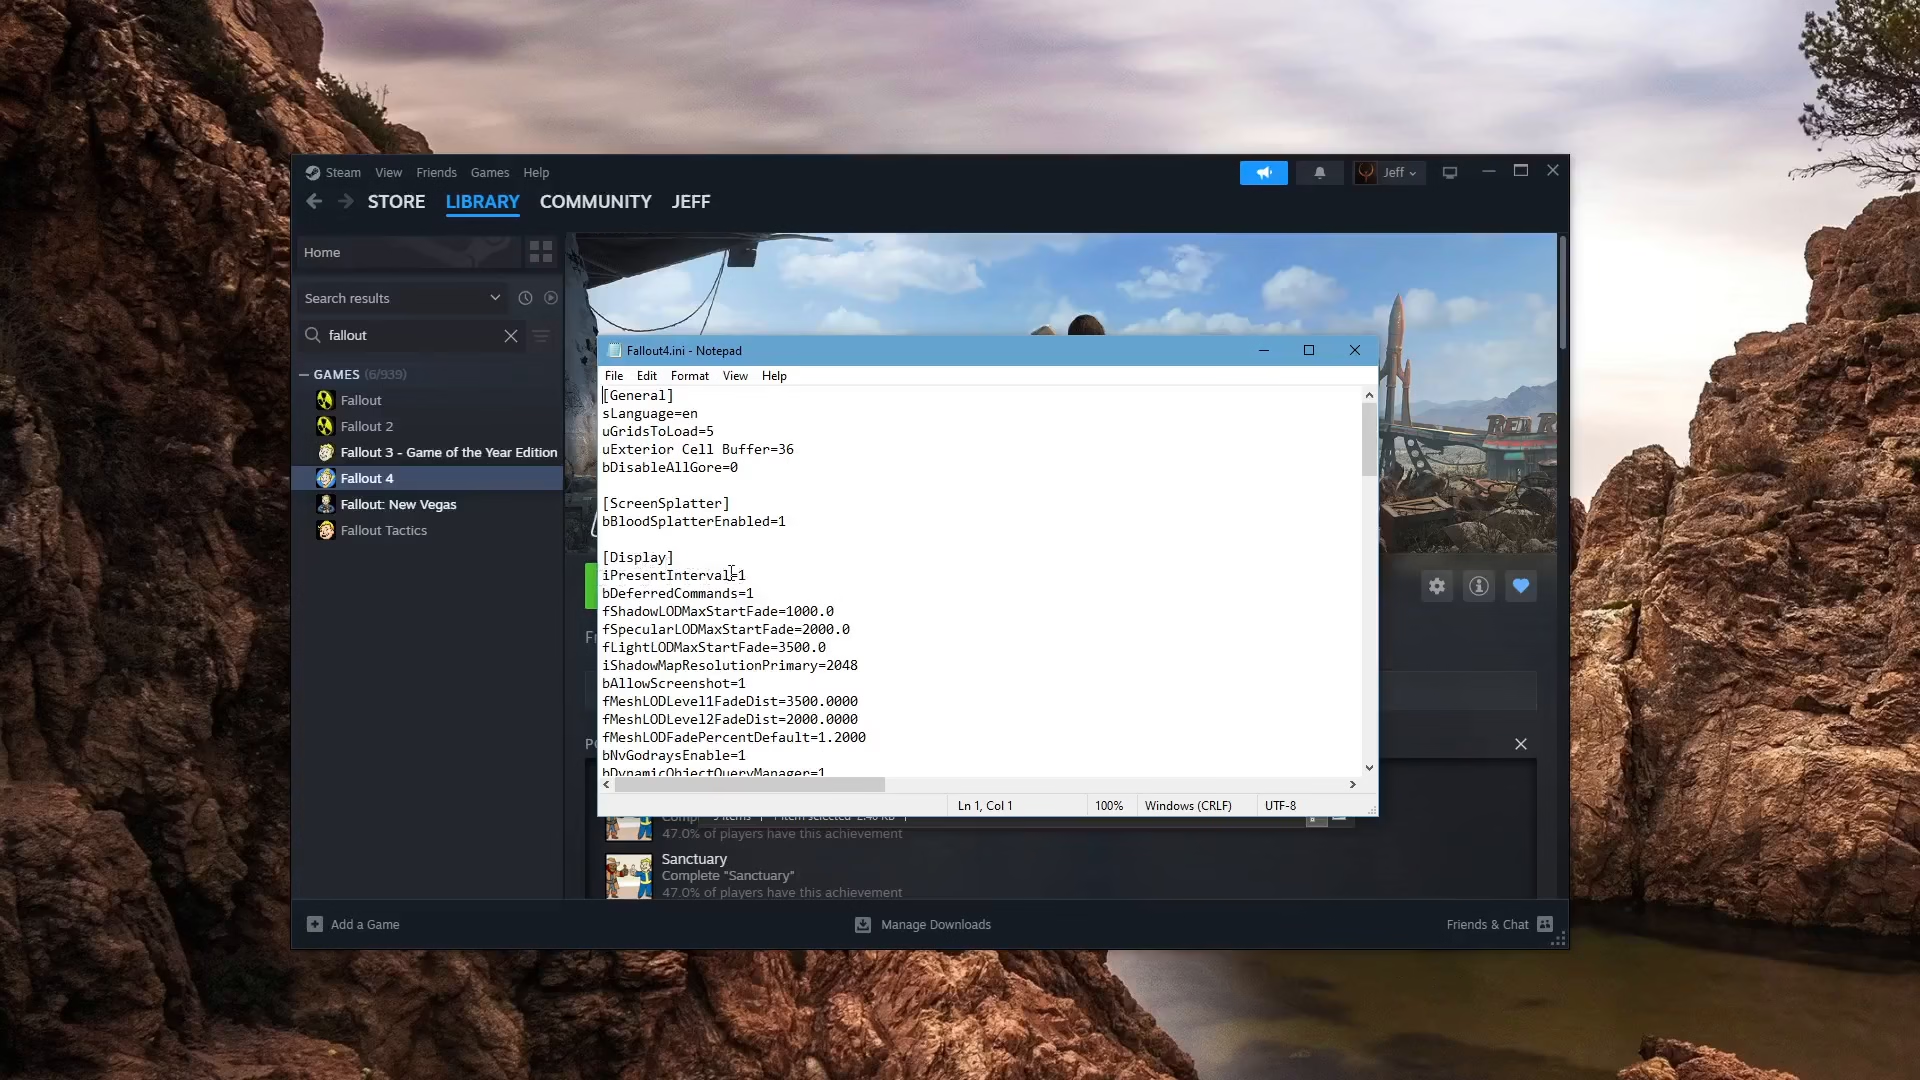
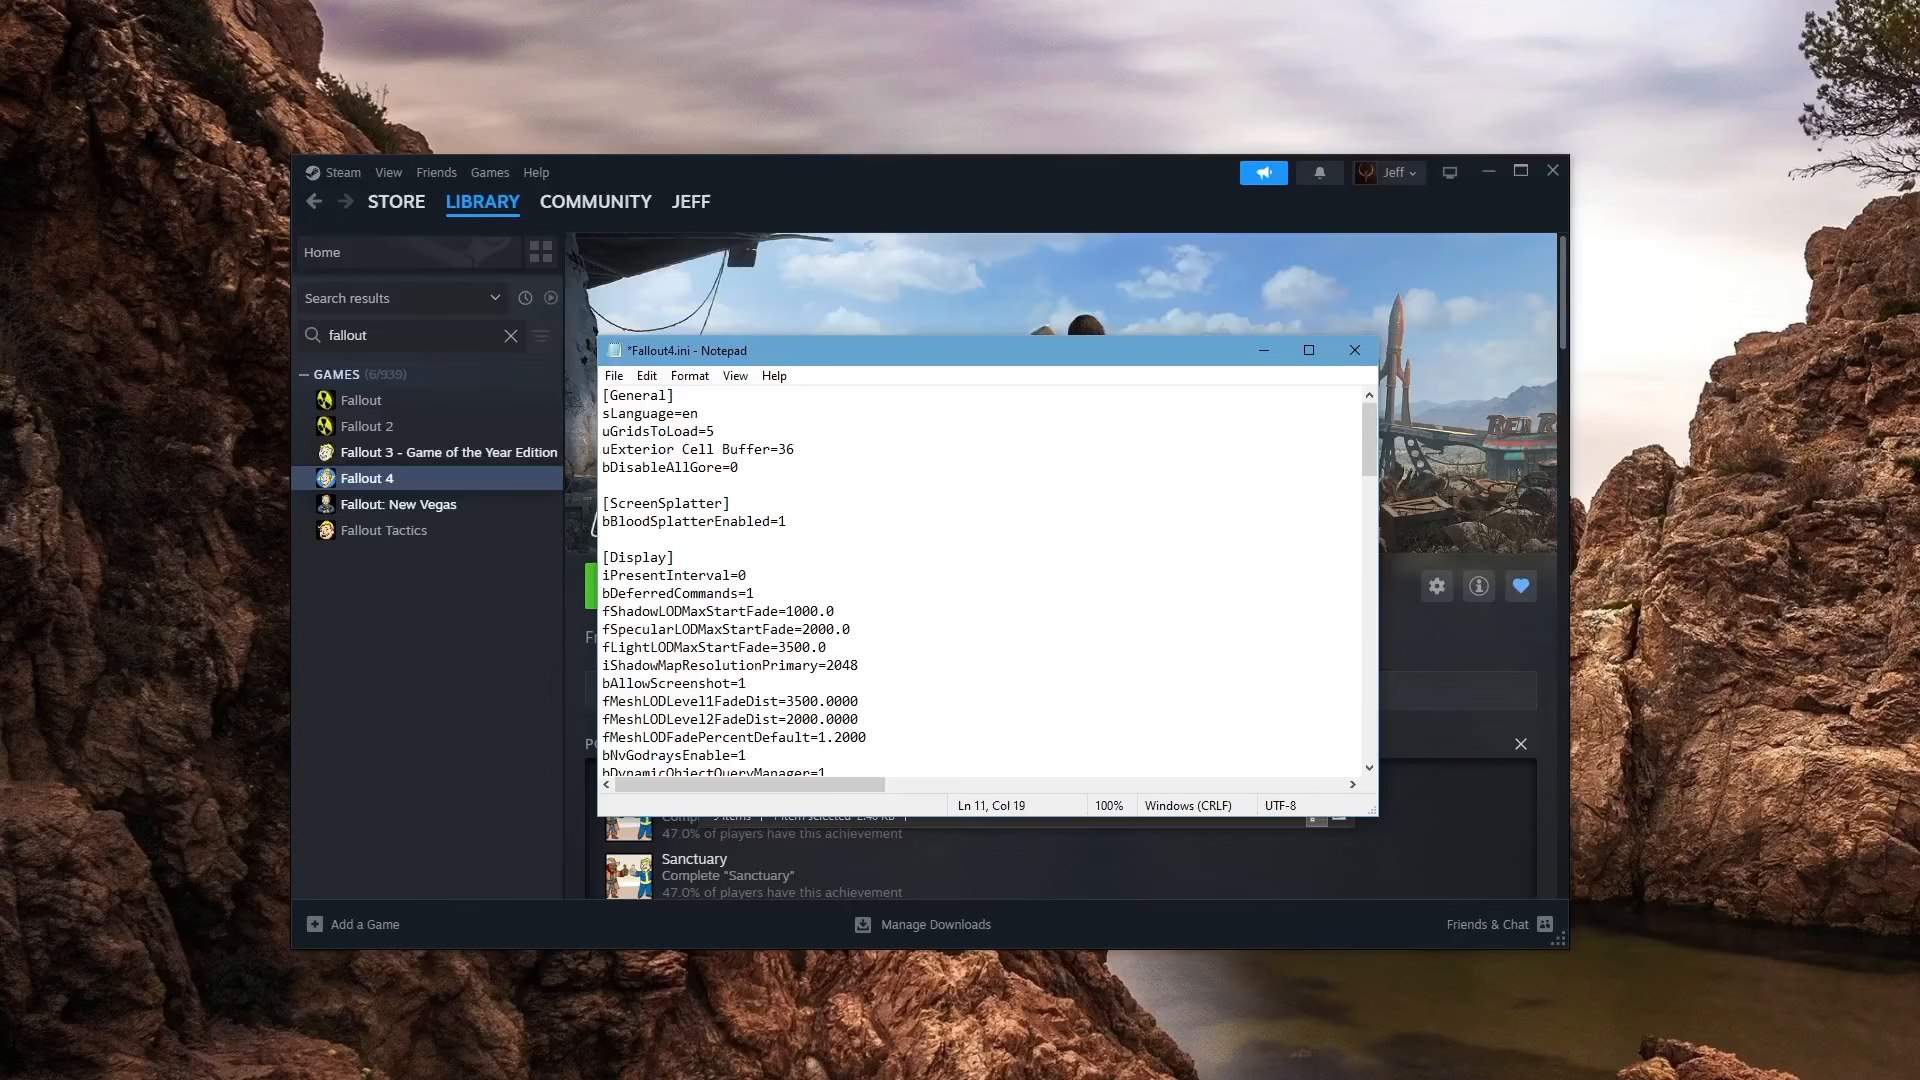
Open the Fallout4.ini file with a text editor. Look for the Display section and find the setting labeled iPresentInterval. Change this value to 0 to disable VSync in this file.
Once you’ve made the change, save the file by pressing Control + S.
Step 4: Edit Fallout4Prefs.ini
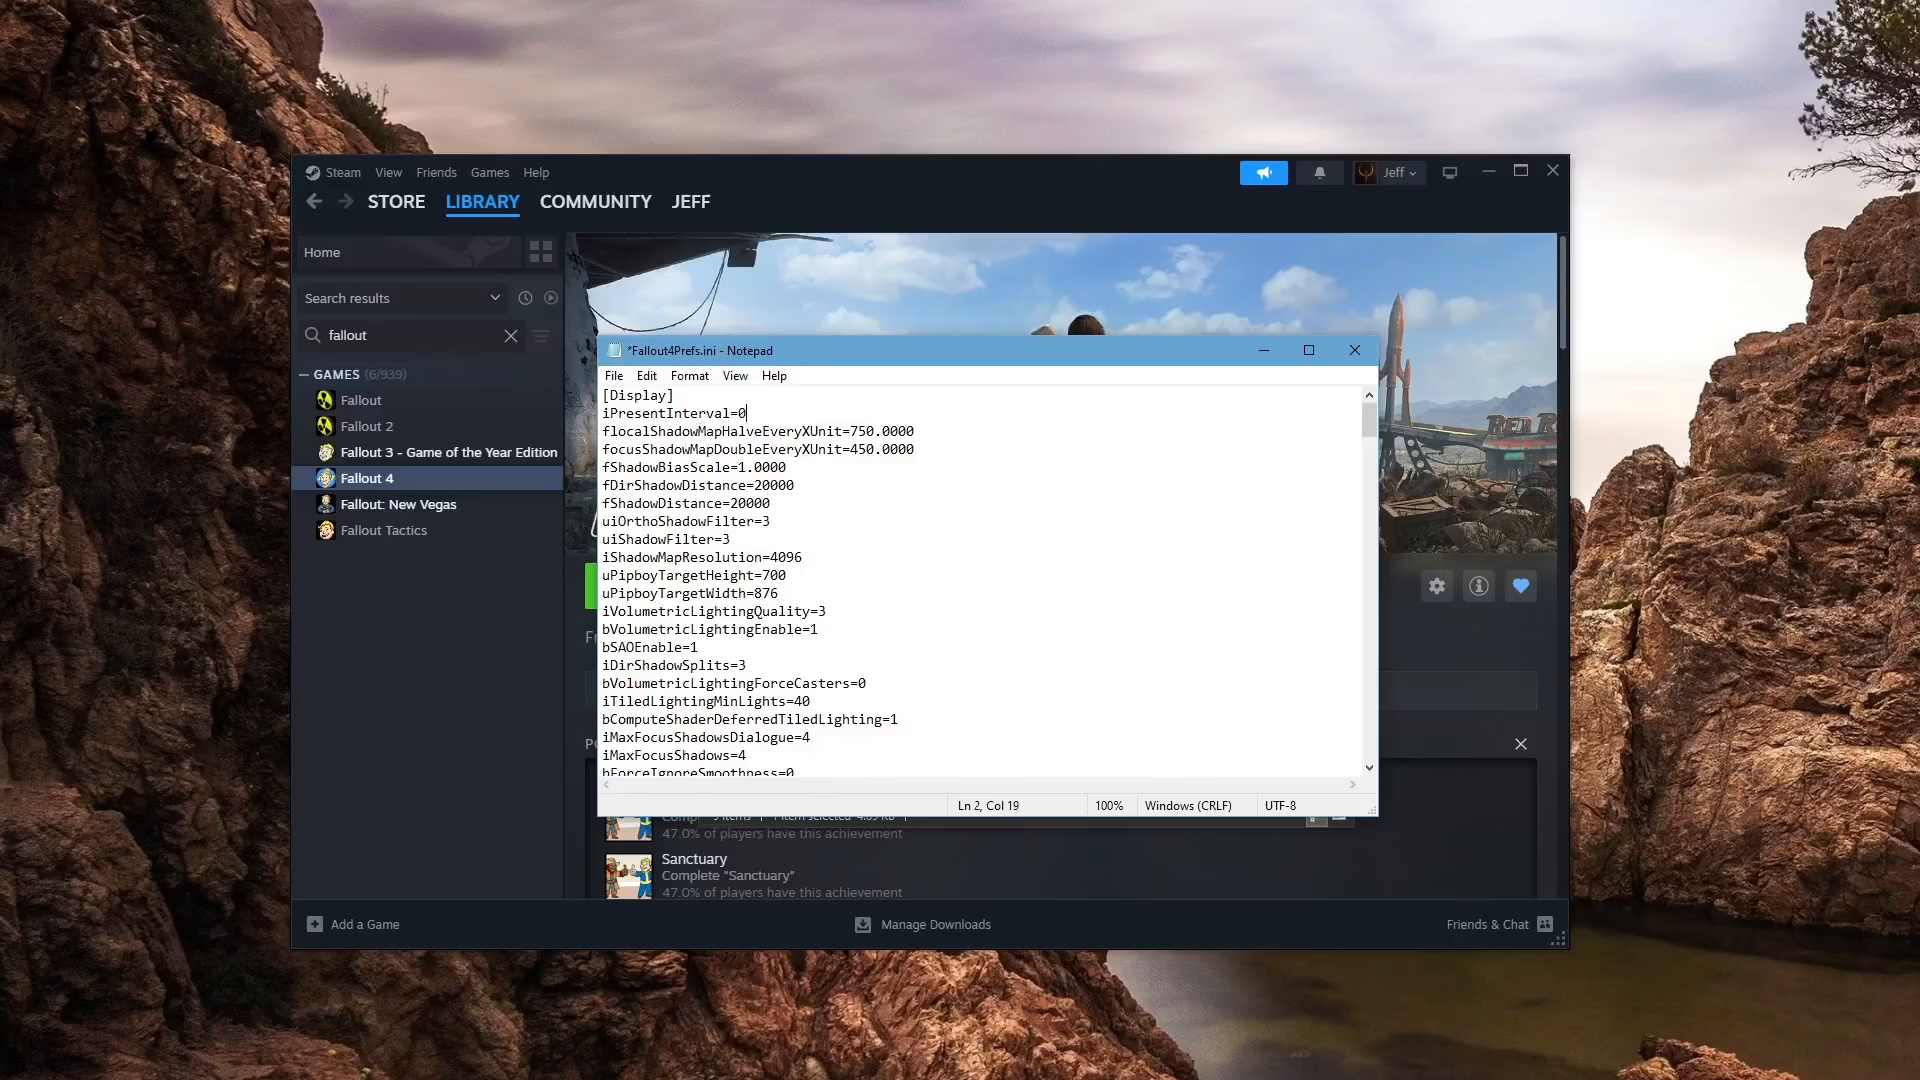
Next, open the Fallout4Prefs.ini file. Find the iPresentInterval setting (this setting appears at the top of the Display section in this file). Set this value to 0 as well.
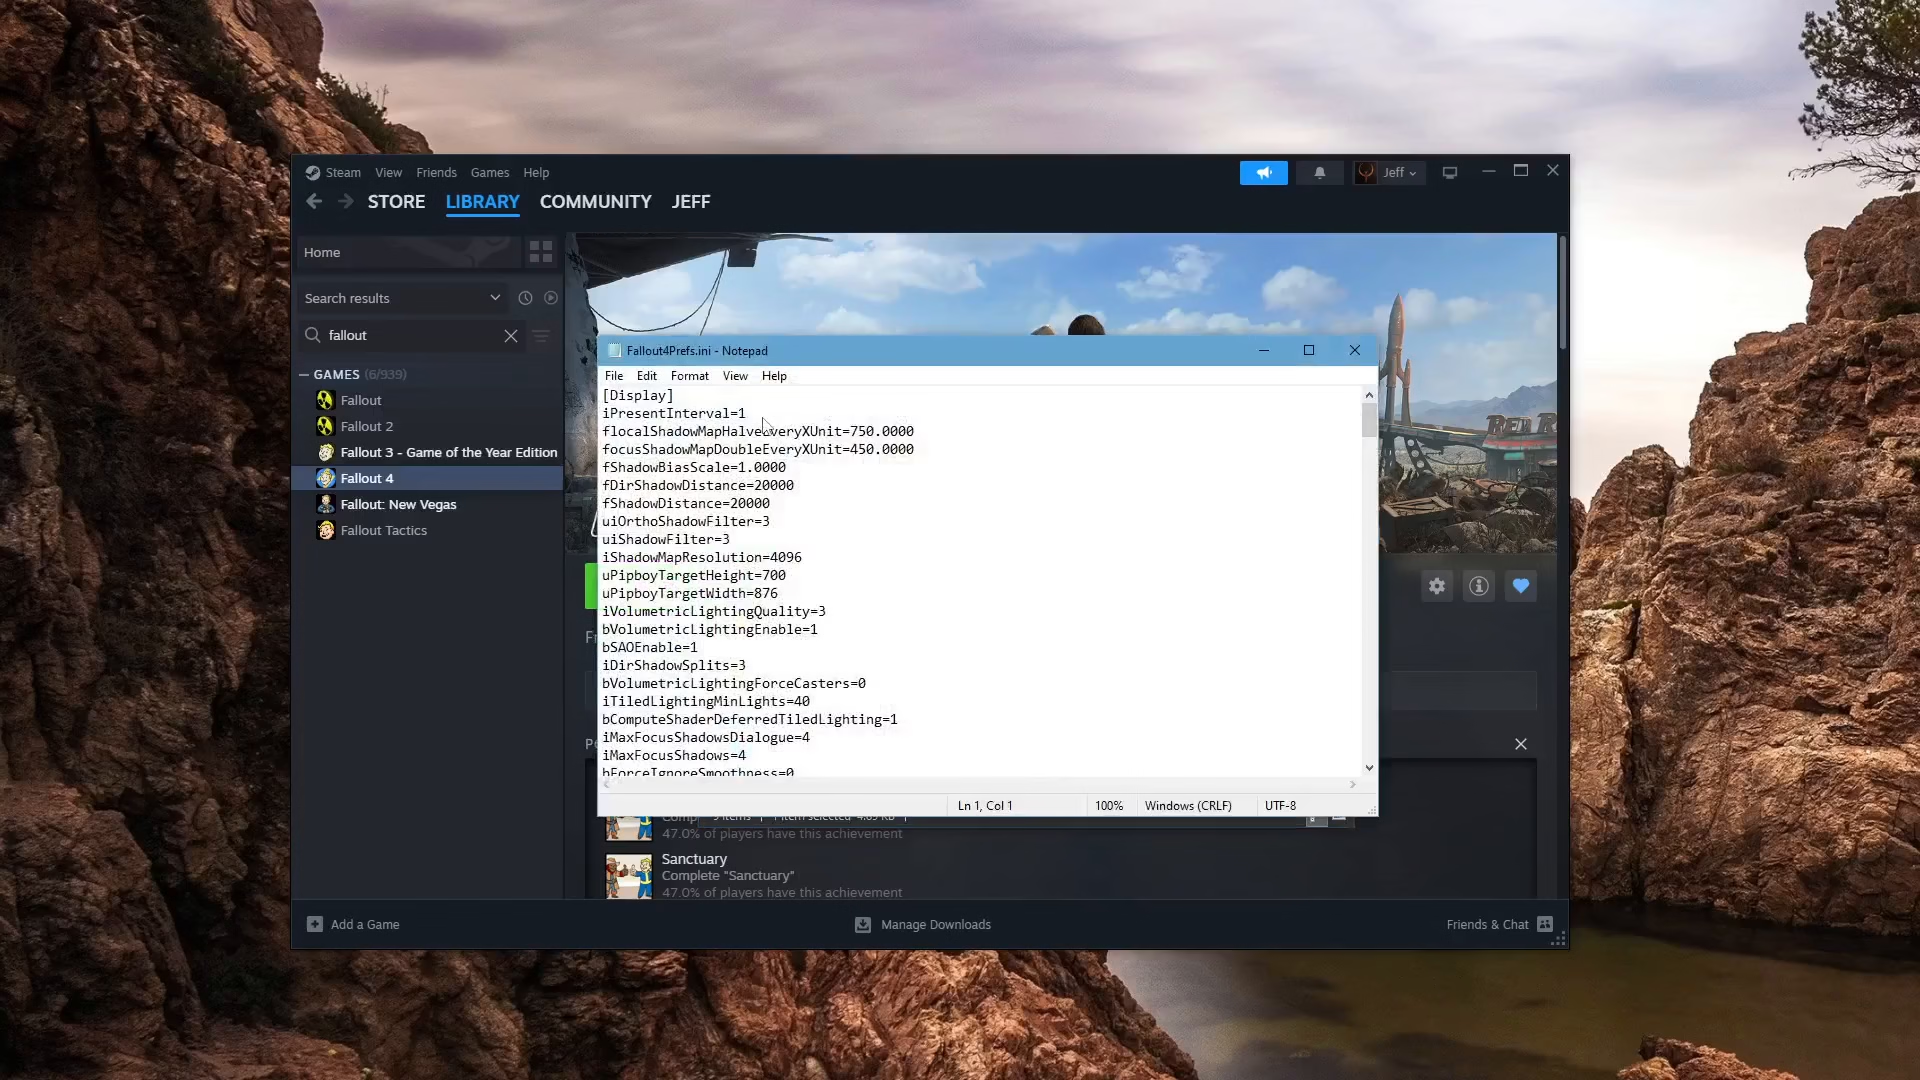
Save this file by pressing Control + S.
Conclusion
You’ve successfully disabled VSync in Fallout 4! By setting the iPresentInterval value to 0 in both your Fallout4.ini and Fallout4Prefs.ini configuration files, VSync is now turned off. This should allow your game to run at higher frame rates without the V-sync cap limiting your performance. Launch Fallout 4 and enjoy smoother gameplay!
— Want to Support? —
If you would like to help us continue making these guides – please consider joining our patreon here – https://www.patreon.com/c/JaviHeals
Alternatively – you can join our discord here – https://discord.gg/zD7Gjt6MHF