





How to Use Voice & Proximity Chat in Wardogs
How to Use Voice & Proximity Chat in Wardogs
Voice and proximity chat are essential communication tools in Wardogs that allow you to coordinate with your squad and interact with nearby players. This guide walks you through the complete setup process, from configuring your audio devices to binding your push-to-talk hotkeys, so you can start communicating effectively in-game.
Configuring Audio Settings
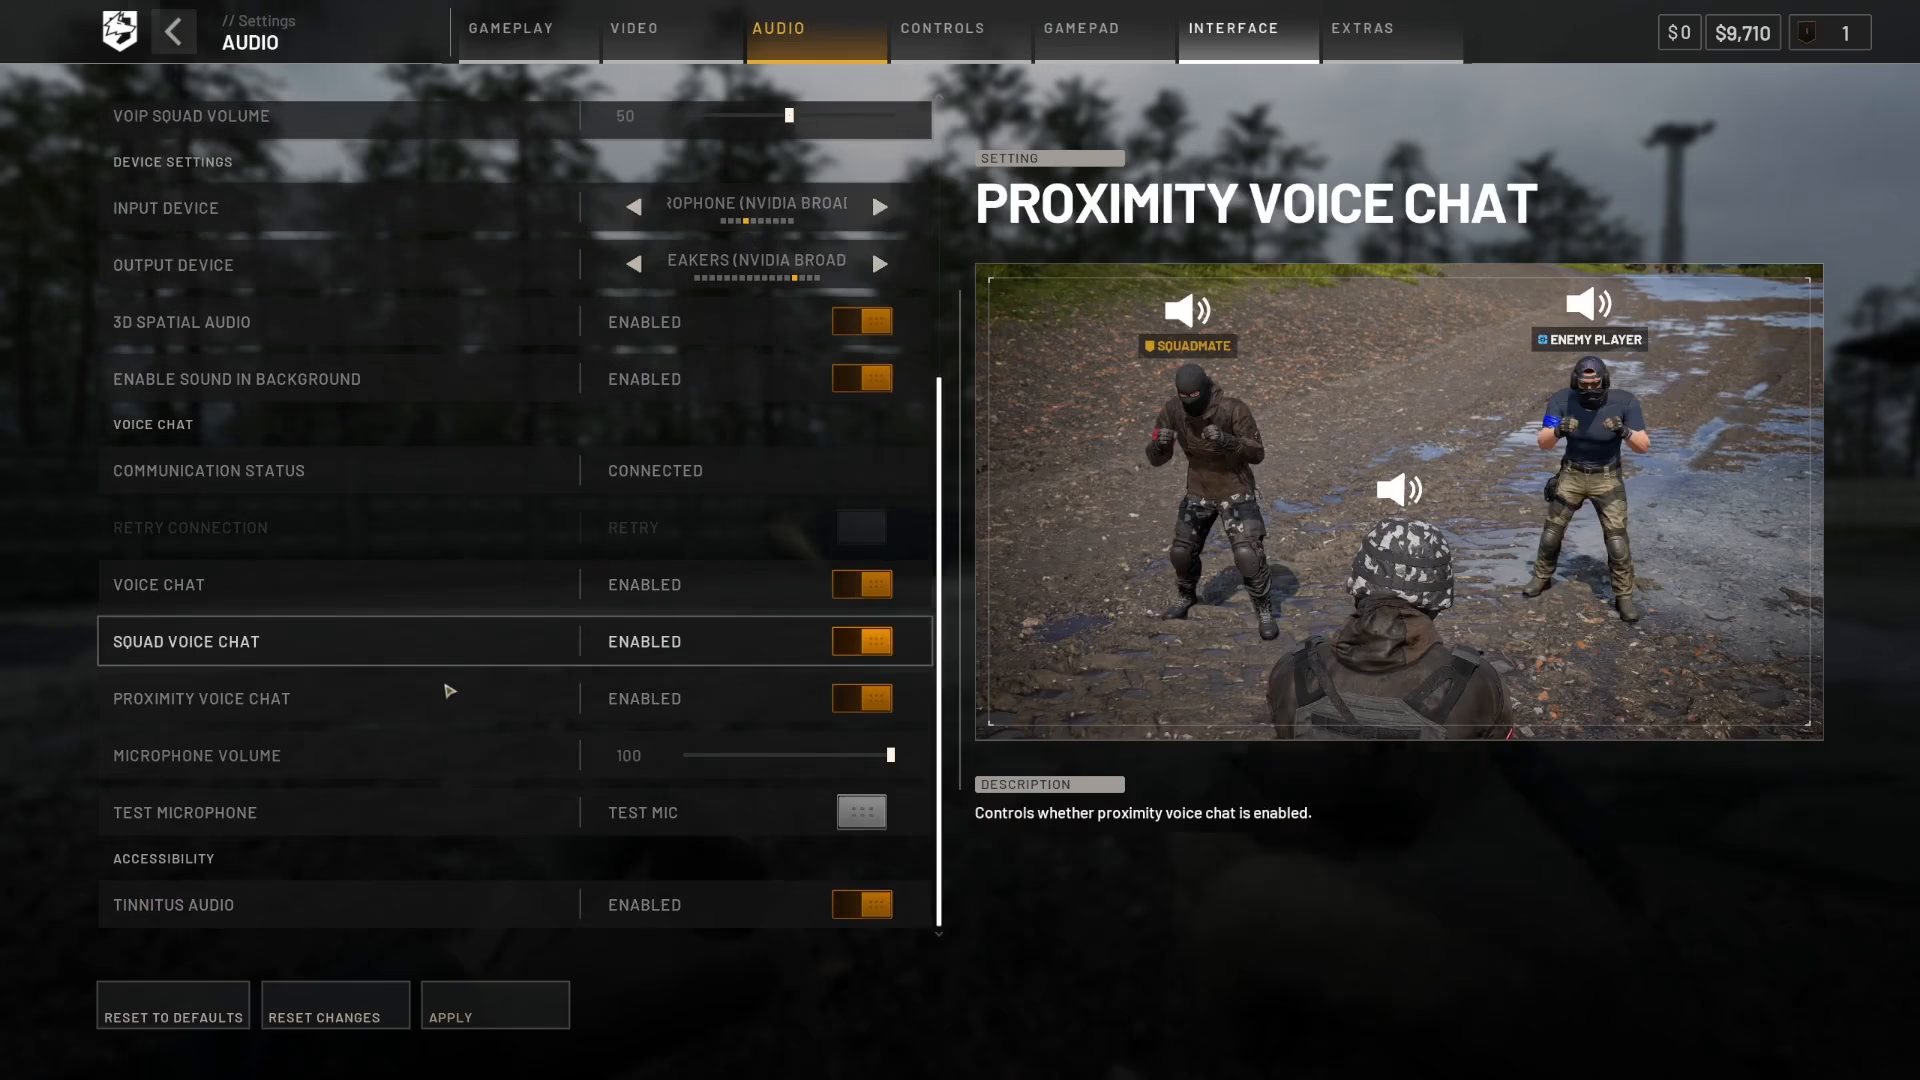
To begin setting up voice chat in Wardogs, open the main menu and navigate to Settings. From there, select the Audio tab to access all voice communication options.
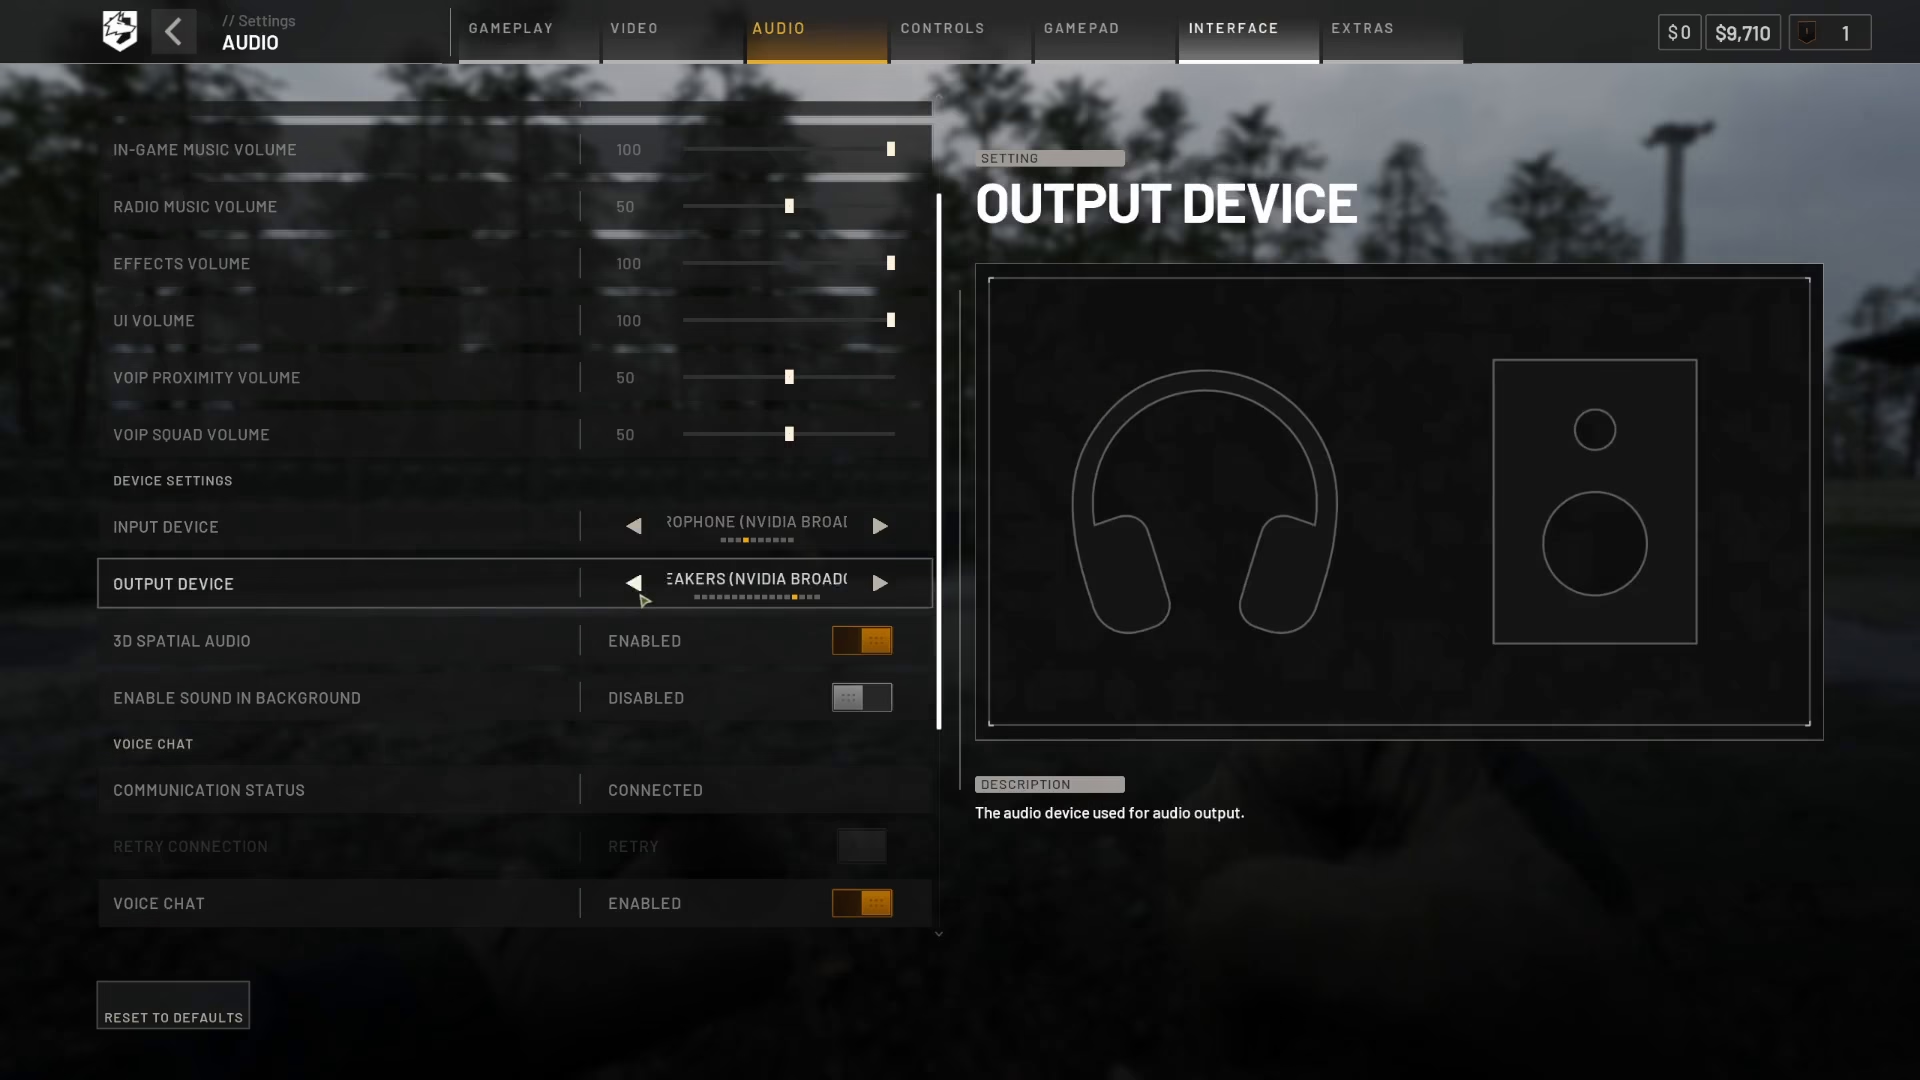
Device Configuration
Within the Audio settings, locate the Device Settings section. Here you’ll need to configure two critical components:
Input Device: Select your microphone from the available options. Make sure you’ve selected the correct device you intend to use for voice communication.
Output Device: Choose your speakers or headphones for audio output.
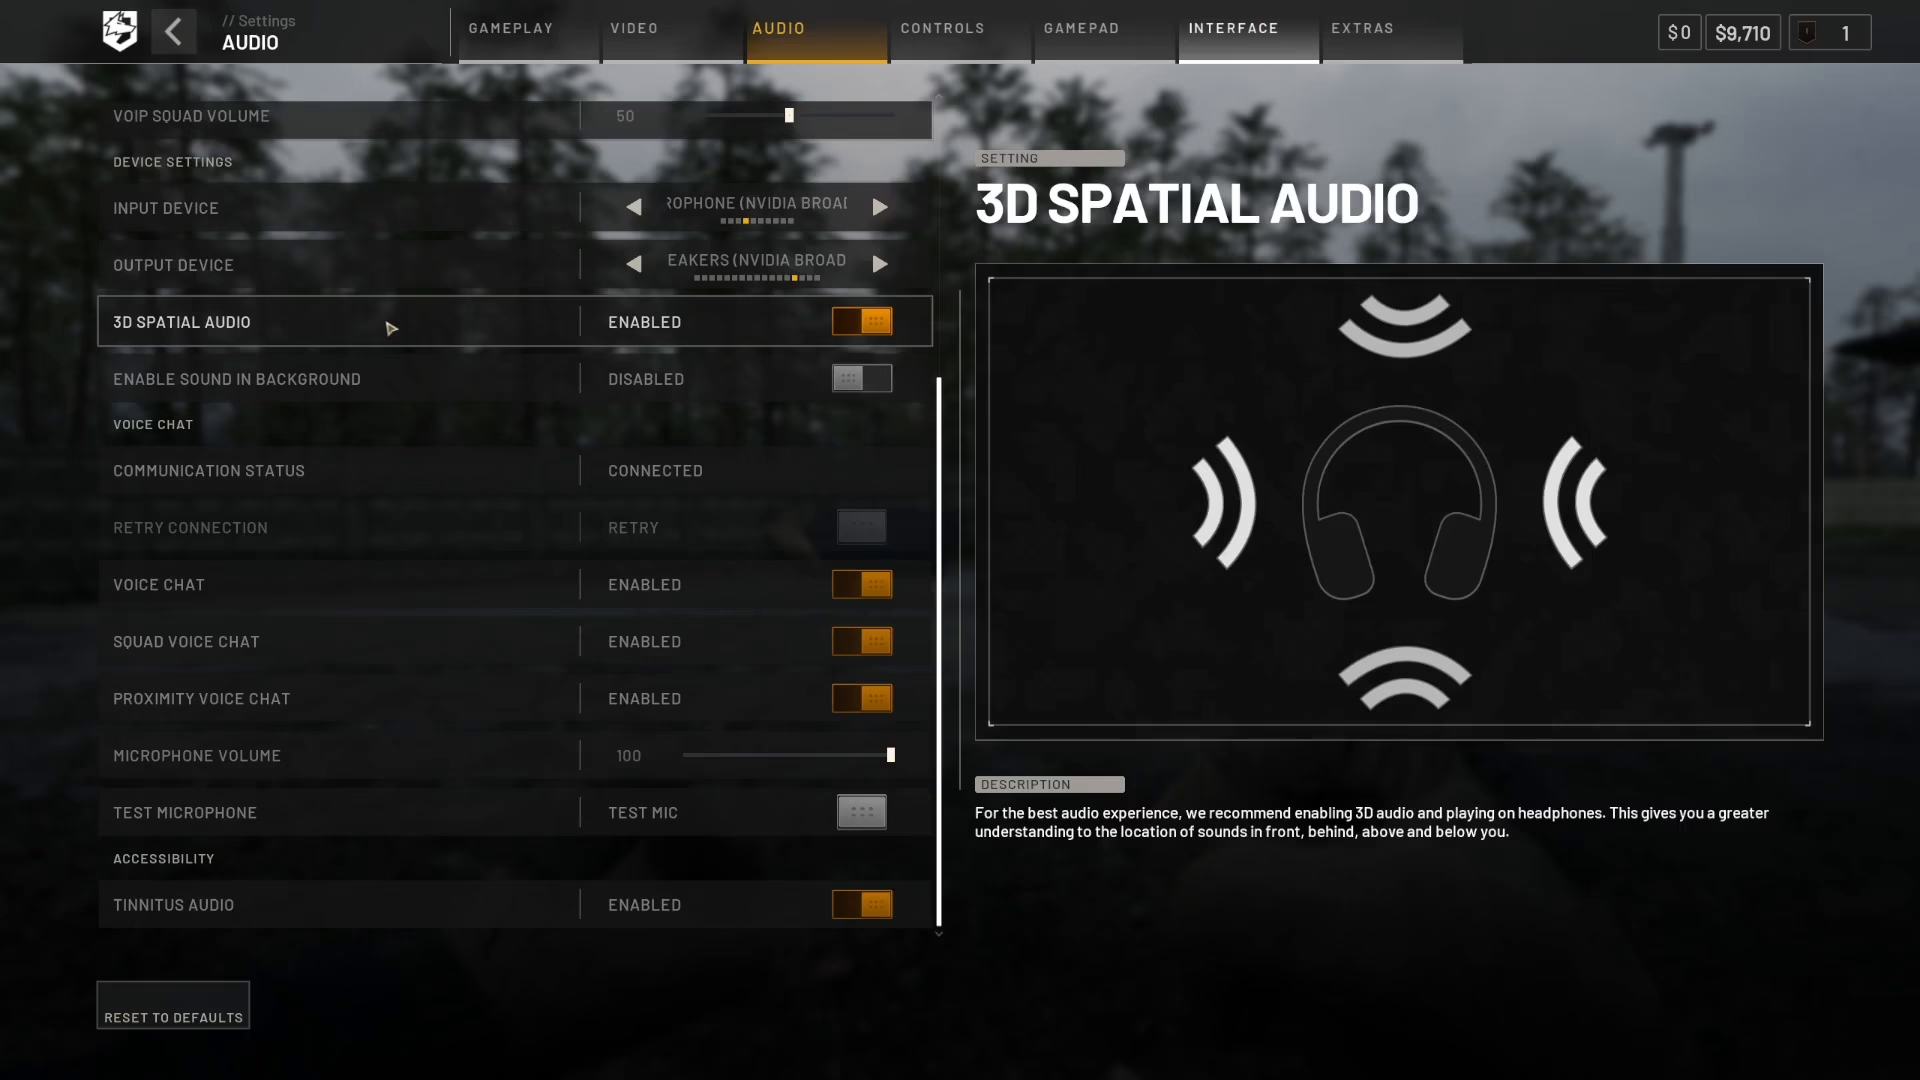
Audio Preferences
Below device settings, you’ll find several audio preference options:
3D Spatial Audio: Enable this option if you want immersive directional sound that helps you locate teammates and enemies based on their position relative to you.
Background Sound: This setting determines whether you hear in-game audio when Wardogs is running in the background (not actively in focus).
Voice Chat Toggles and Testing
The Audio menu includes several toggle options to enable different communication channels:
Enable Voice Chat: Toggle this on to activate all voice communication features.
Squad Voice Chat: Enable this to communicate exclusively with your squad members.
Proximity Chat: Turn this on to hear and communicate with players near your character location, regardless of squad affiliation.
Voice Chat Volume: Adjust the master volume level for all incoming voice communications.
Wardogs also provides a microphone test feature in this menu. Use it to verify that your microphone is functioning properly before entering a match.
Setting Up Push-to-Talk Controls
Configuring voice chat settings alone isn’t enough—you also need to bind your push-to-talk hotkeys. These keybindings determine which buttons you press to activate voice transmission.
Accessing Key Bindings
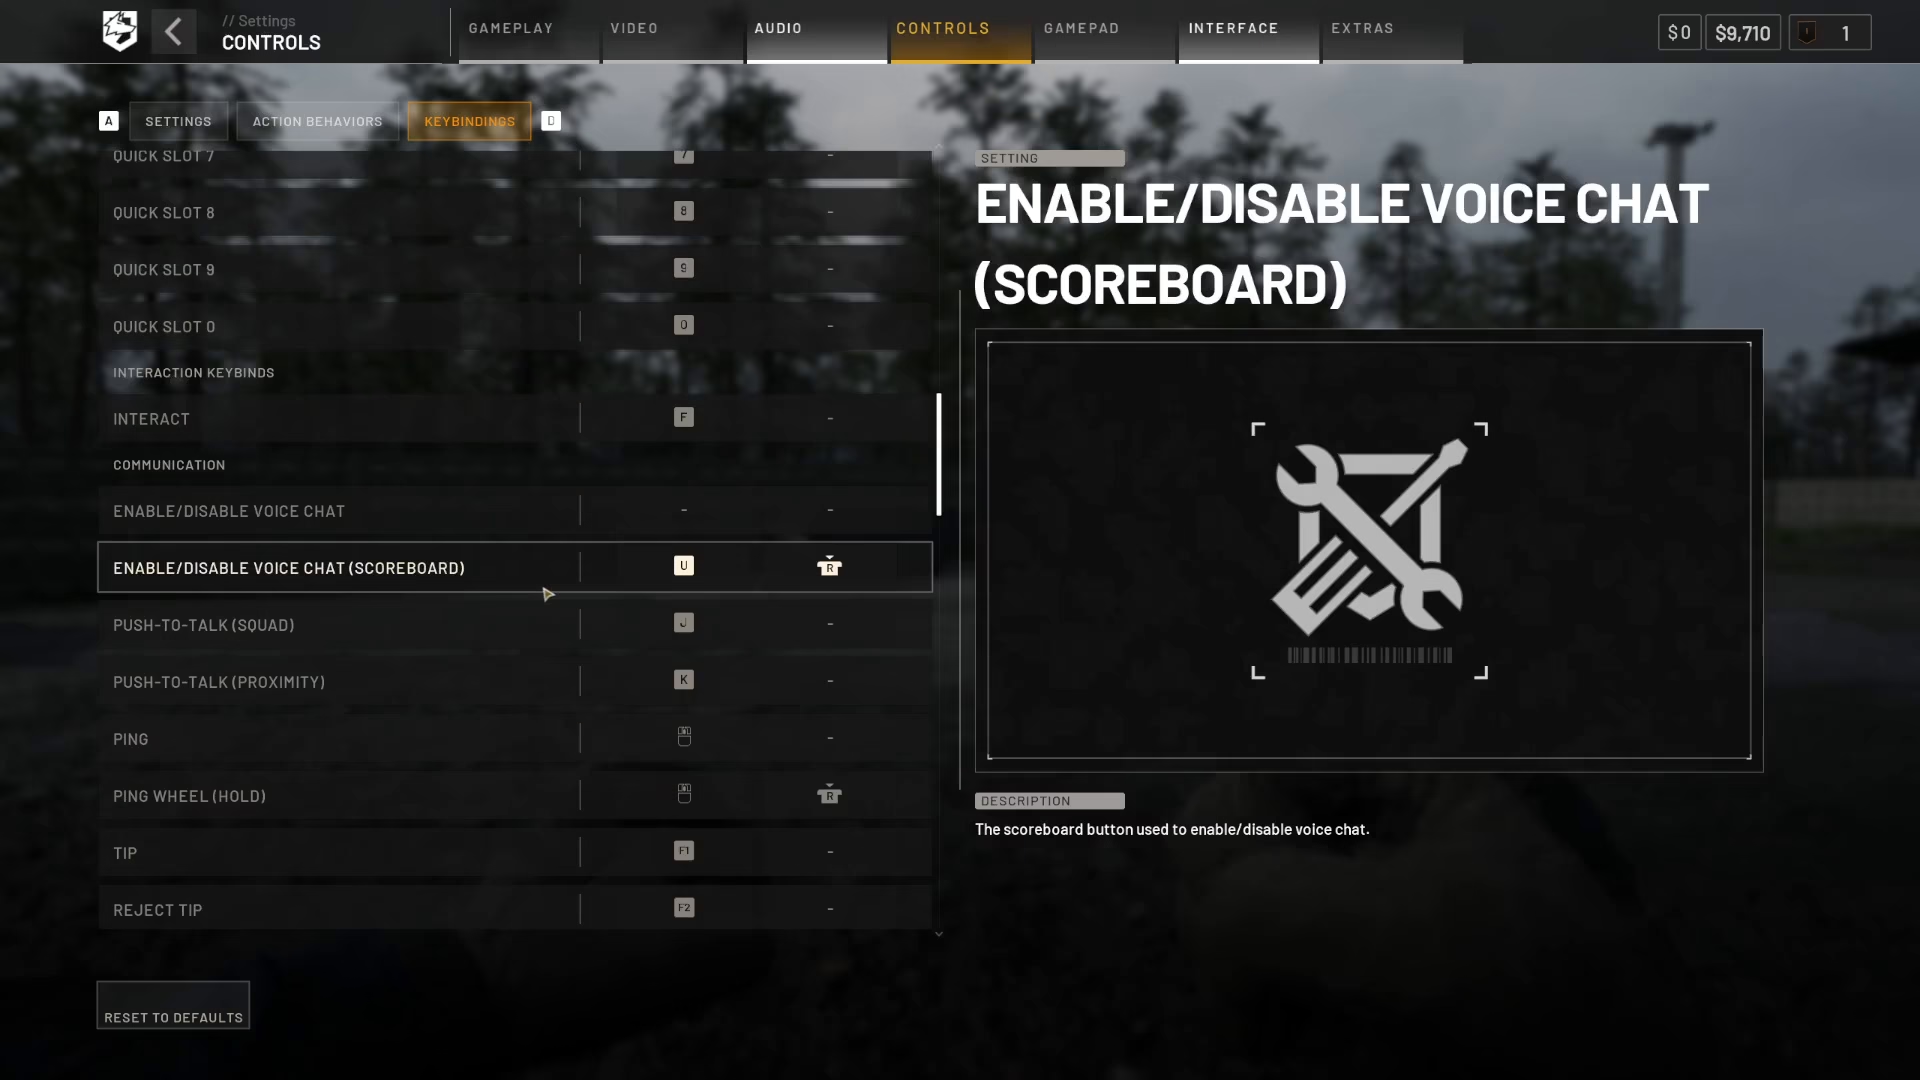
Return to the main Settings menu and select Controls from the top navigation. Then click on Key Bindings to view and customize your control scheme.
Interaction Key Bindings
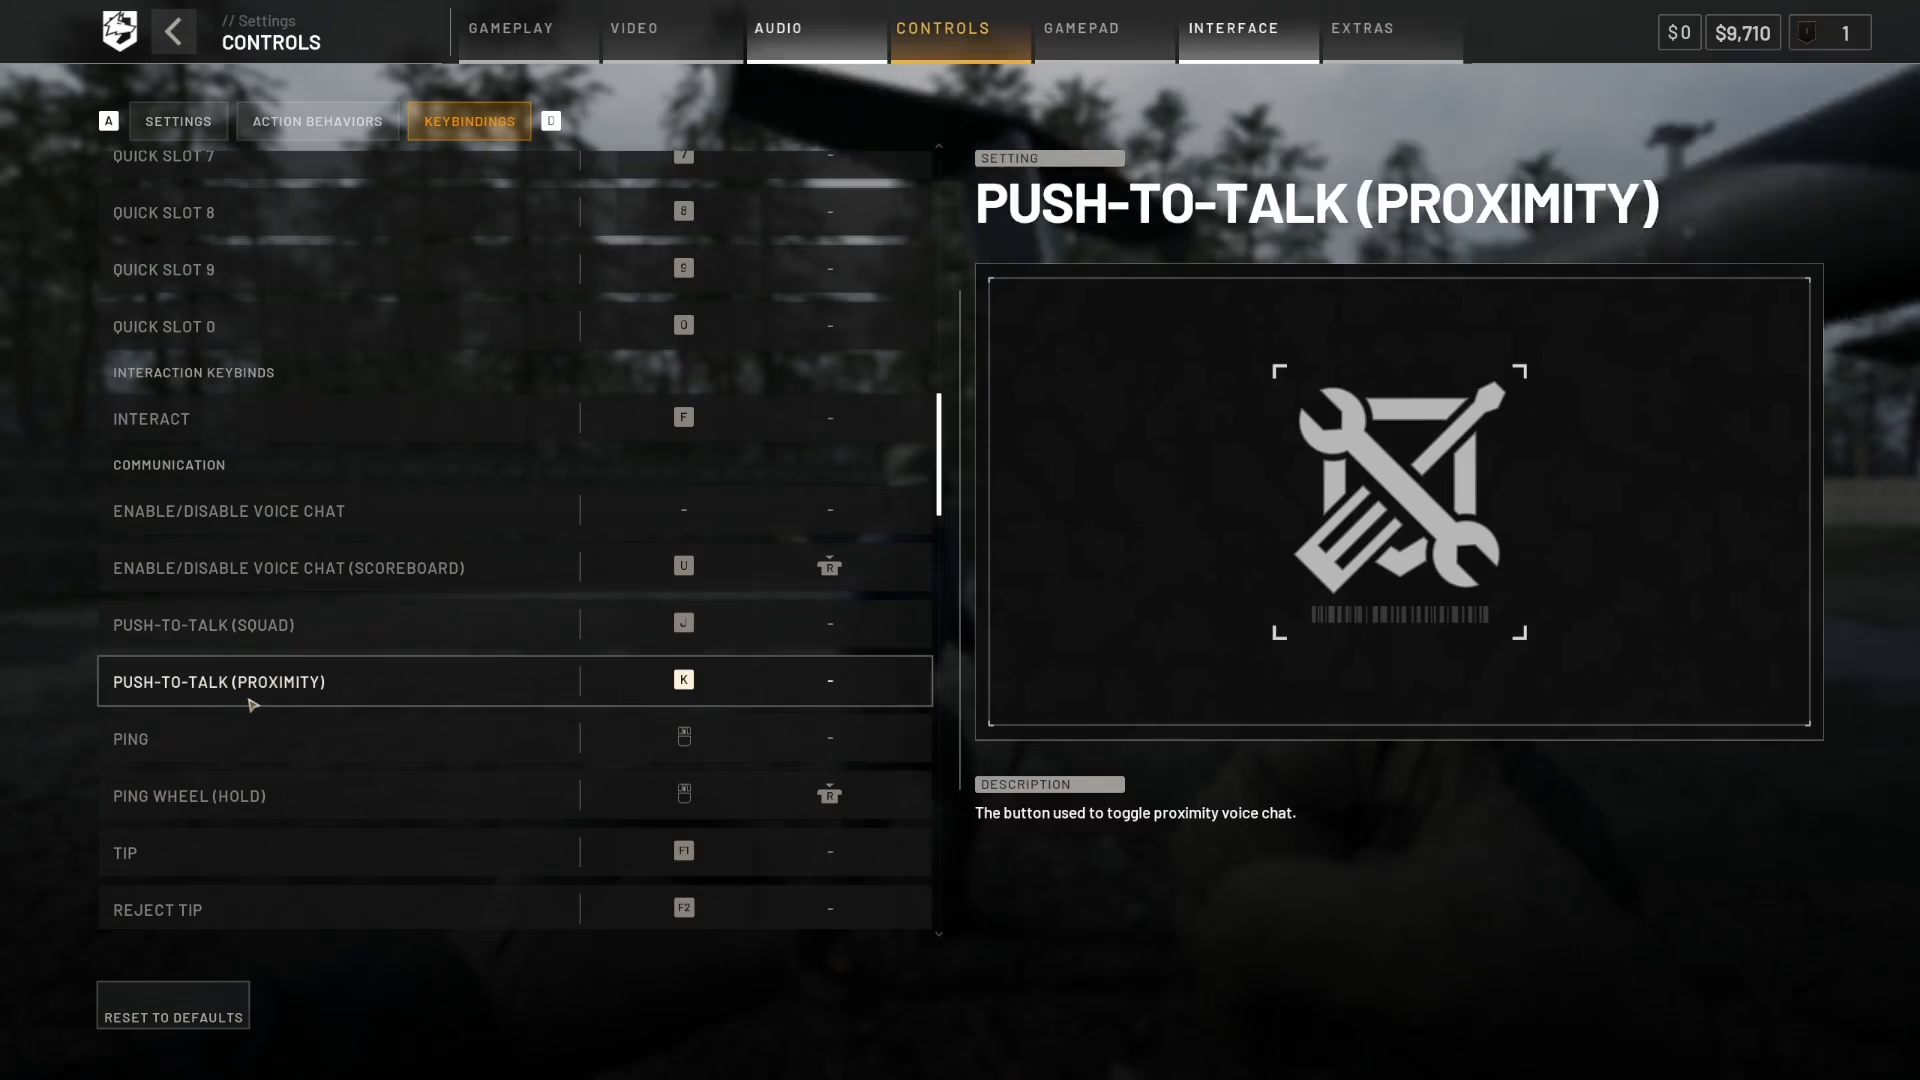
Scroll down through the Key Bindings menu until you reach the Interaction Key Bindings section. Here you’ll find the voice communication controls:
Push to Talk (Proximity): Default binding is K. Press and hold this key to transmit your voice to all players within proximity range.
Push to Talk (Squad): Default binding is J. Press and hold this key to transmit your voice exclusively to your squad members.
You can rebind these keys to whatever feels most comfortable for your playstyle. Simply click on the binding and press your desired key to reassign it.
Summary
You’re now fully equipped to use voice and proximity chat in Wardogs. Remember to configure your input and output devices in Audio settings, enable the chat features you want to use, and set your preferred push-to-talk hotkeys in the Controls menu. The default proximity chat key is K and squad chat is J, though you can customize these to your preference. Test your microphone before your first match to ensure crystal-clear communication with your teammates.
— Want to Support? —
If you would like to help us continue making these guides – please consider joining our patreon here – https://www.patreon.com/c/JaviHeals
Alternatively – you can join our discord here – https://discord.gg/zD7Gjt6MHF